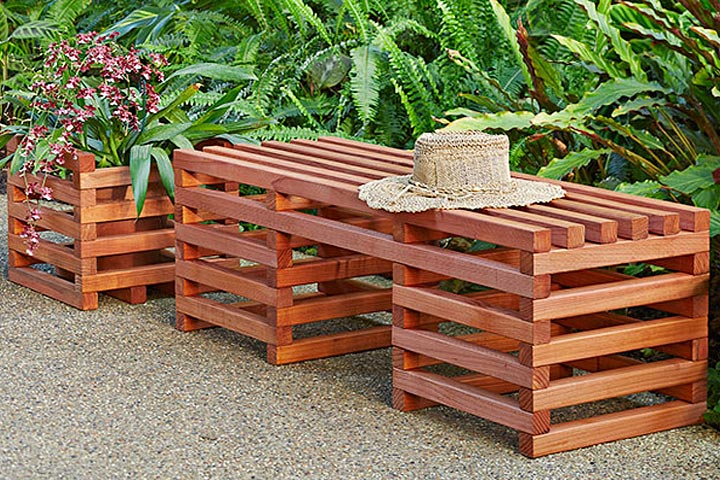
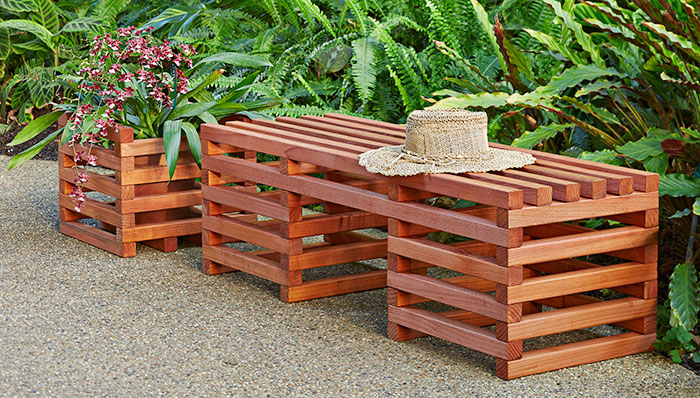
Create a place to sit and enjoy the outdoors with this easy-to-build wooden bench. Then use the same technique to make a matching planter surround.
Tools
- Miter saw
- Drill and bit set
- Tape measure
- Carpenter’s square
- 120-grit sandpaper
- Exterior wood glue
Materials
- 10 – 2 x 2 x 8 clear cedar boards
- #7 x 2-1/4-in countersinking-head, stainless-steel deck screws
- Olympic Maximum semi-transparent exterior stain, Redwood
Create the Bench
Step 1
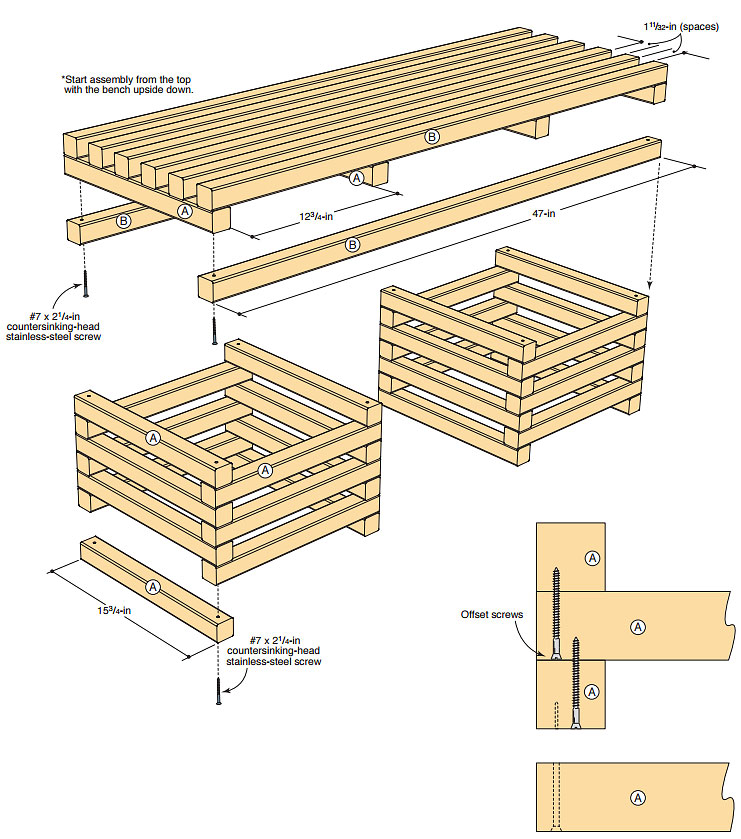
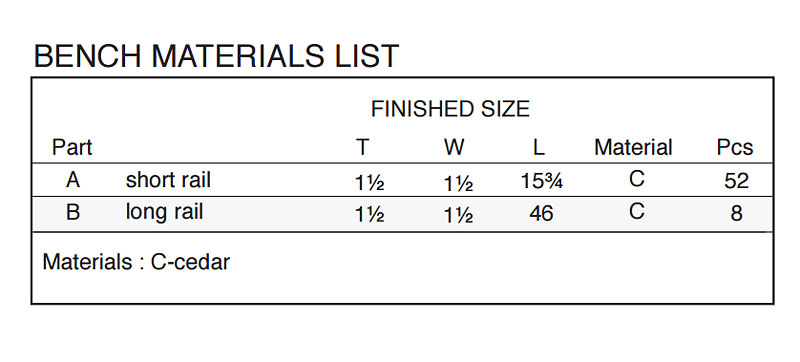
From the 2 x 2 boards, cut 32 pieces 15-3/4 inches long and eight pieces 47 inches long (Slat-Style Outdoor Bench and Planter Project Diagrams). Then cut four 1-11/32-inch-long spacers and set them aside for now. Sand the pieces smooth and wipe them clean.
Good to Know: You’ll need a flat work surface where you can build the complete bench upside down, which eliminate exposed screws on the bench top.
Step 2
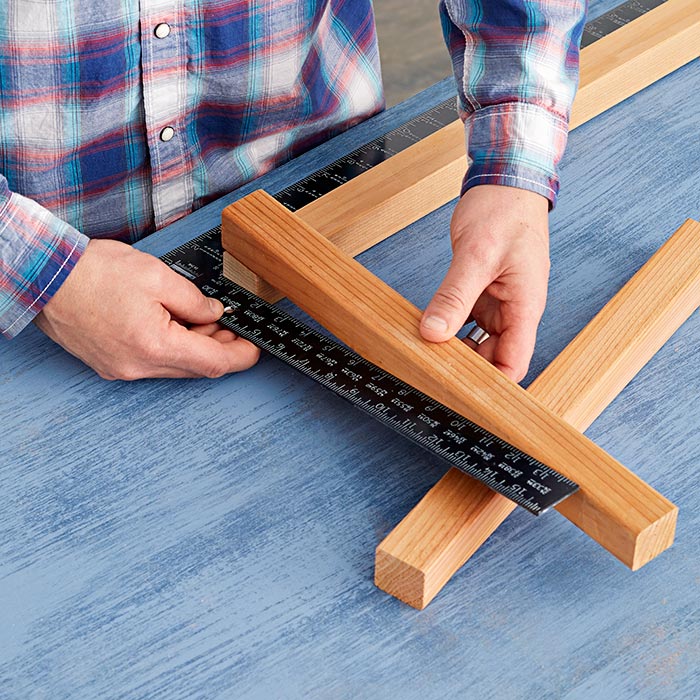
Lay a framing square on the work surface with one leg against the side of a 47-inch piece and the other leg against its end. Lay a 15-3/4-inch board on the 47-inch piece with the other end supported, and tilt the square slightly to square the two pieces. Dab exterior wood glue on the upper face of the 47-inch board at the end, drill a 3/32-inch pilot hole, and screw the 15-3/4-inch board to the 47-inch board. Repeat for a second long and short piece. Then use the square to fasten the two L-shape assemblies into a frame.
Good to Know :Each pair of boards will be screwed to the ones below. To keep the screws from being blocked by the screw heads underneath, alternate the pilot hole positions between being slightly inset toward the center on one layer and slightly offset toward the outside corners on the next layer. (The type of stainless-steel screws shown have heads that are narrower than most exterior screws.)
Step 3
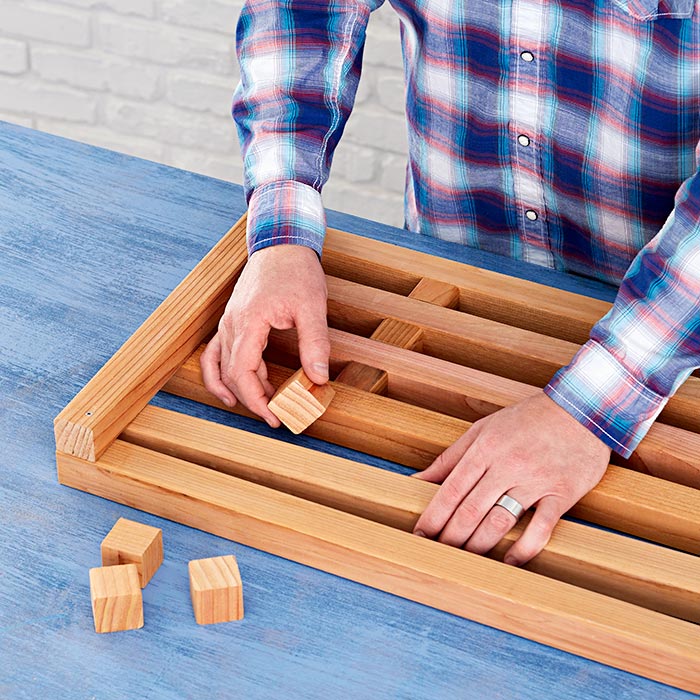
Working between the two long sides of the frame, alternate the 1-11/32-inch spacers with the top long slats. Keep the ends flush with the outside end pieces. Glue, drill, and screw the inside slats to the ends of the frame.
Step 4
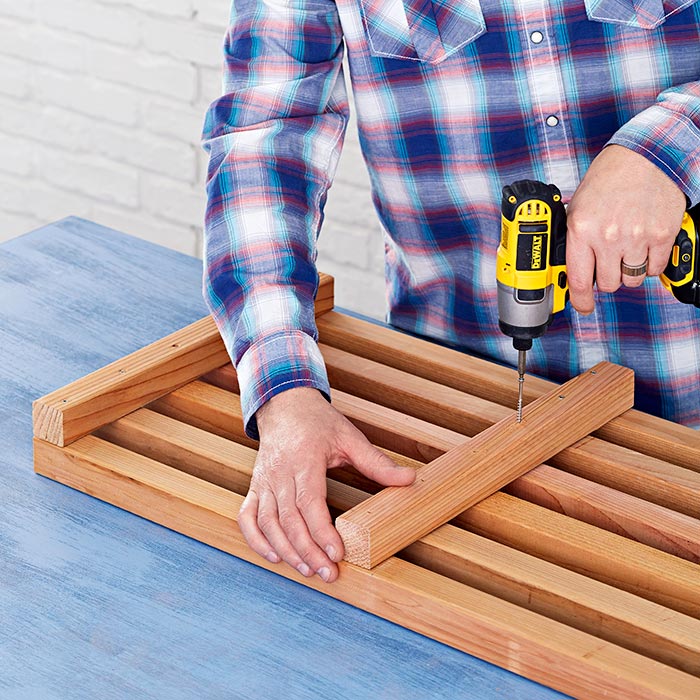
Measure 12-3/4 inches in from the end and mark the locations for the middle pieces. Glue, drill, and screw the middle 15-3/4-inch boards in place.
Step 5
Glue, drill, and screw the two remaining 47-inch pieces to the four 15-3/4-inch boards to form the sides.
Step 6
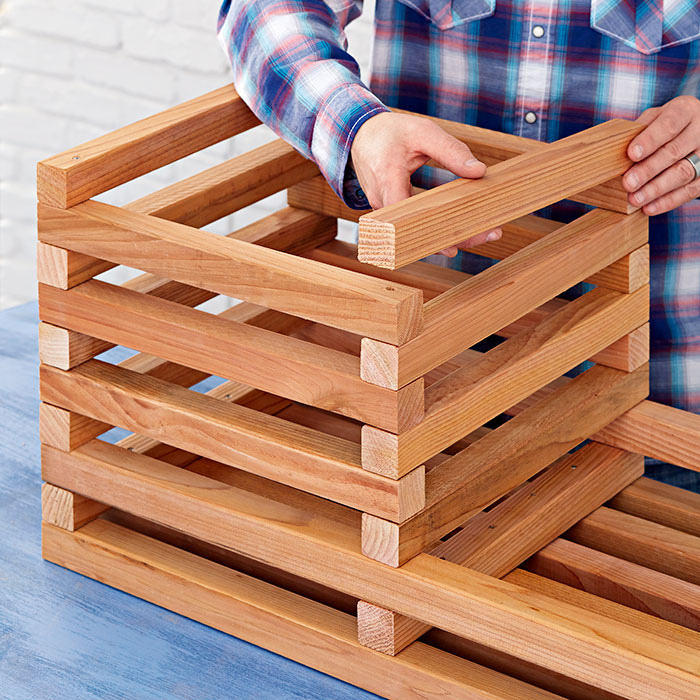
Glue, drill, and screw alternating pairs of 15-3/4-inch boards to form one leg of the bench. Repeat for the other leg. Allow about two hours for the glue to dry.
Step 7
Wipe the bench clean. Then apply a generous coat of stain (Redwood shown) to even out the wood colors. Allow it to penetrate and wipe off the excess.
Good to Know: Before disposing of any rags or towels containing stain, lay them on a flat outdoor surface to dry completely to avoid the risk of spontaneous combustion.
Build a Matching Planter
Step 1
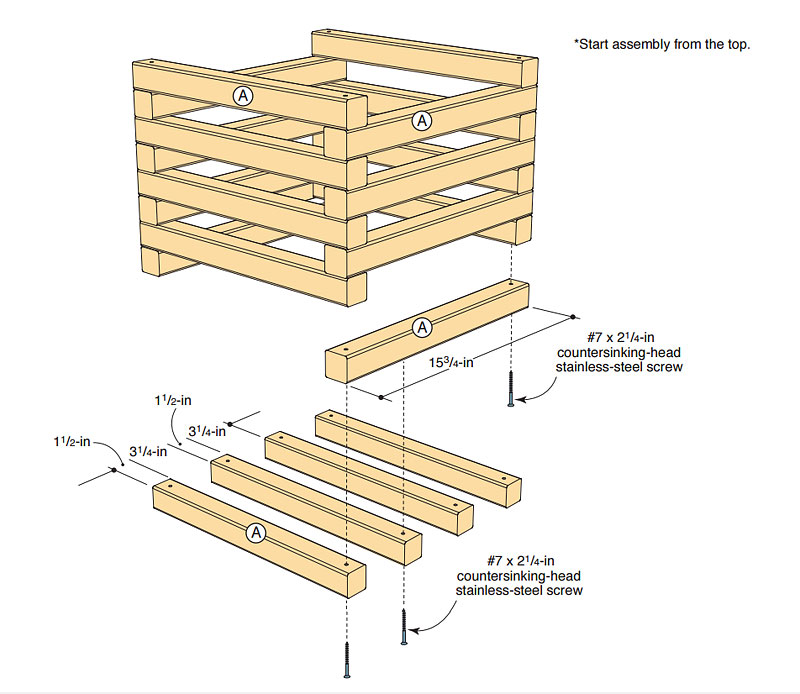
To make a matching planter surround, cut an even number of 15-3/4-inch-long pieces sufficient to hide the planter you plan to use (Slat-Style Outdoor Bench and Planter Project Diagrams). To calculate the quantity needed, measure the height of your planter. Divide that number by 1-1/2, rounding up to the next highest number. Then multiply that number by 2 for the quantity of pieces to cut, add another two for the bottom slats, and calculate the total.
Good to Know: The part sizes shown can accommodate a 12-1/2-inch-diameter planter. For larger planters, increase the part lengths as needed.
Step 2
On a flat work surface, place a 15-3/4-inch part in the inside corner of a framing square. Place a parallel part 12-3/4 inches away with the ends flush. Glue, drill, and screw crosspieces in place with the offset screw method used on the bench.
Step 3
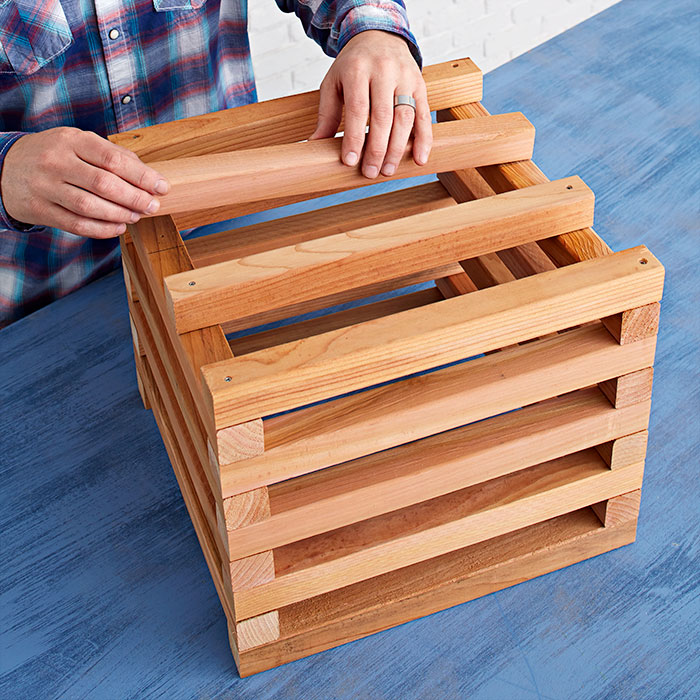
Continue adding alternating crosspieces until you reach the desired height. Then add evenly spaced pieces between the top outside pieces to form the bottom.
Step 4
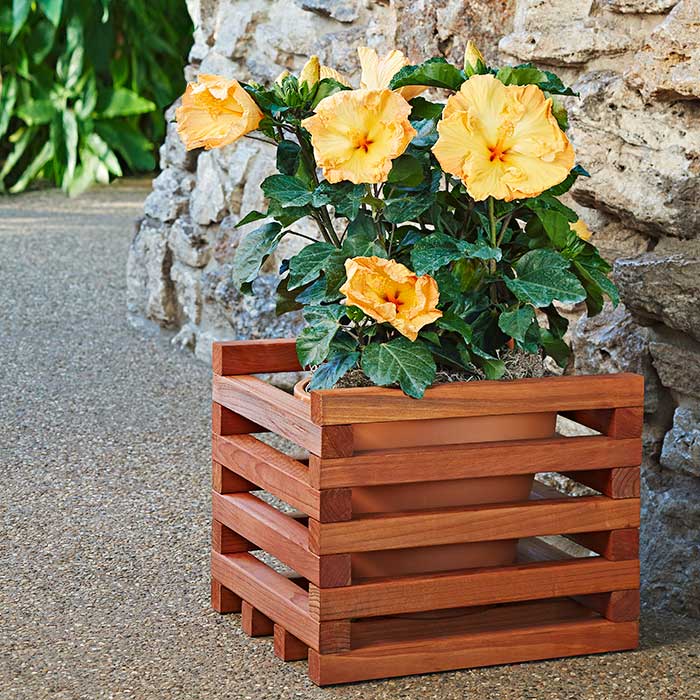
Finish as desired to even out the different colors of the wood and provide protection.


Leave a Reply