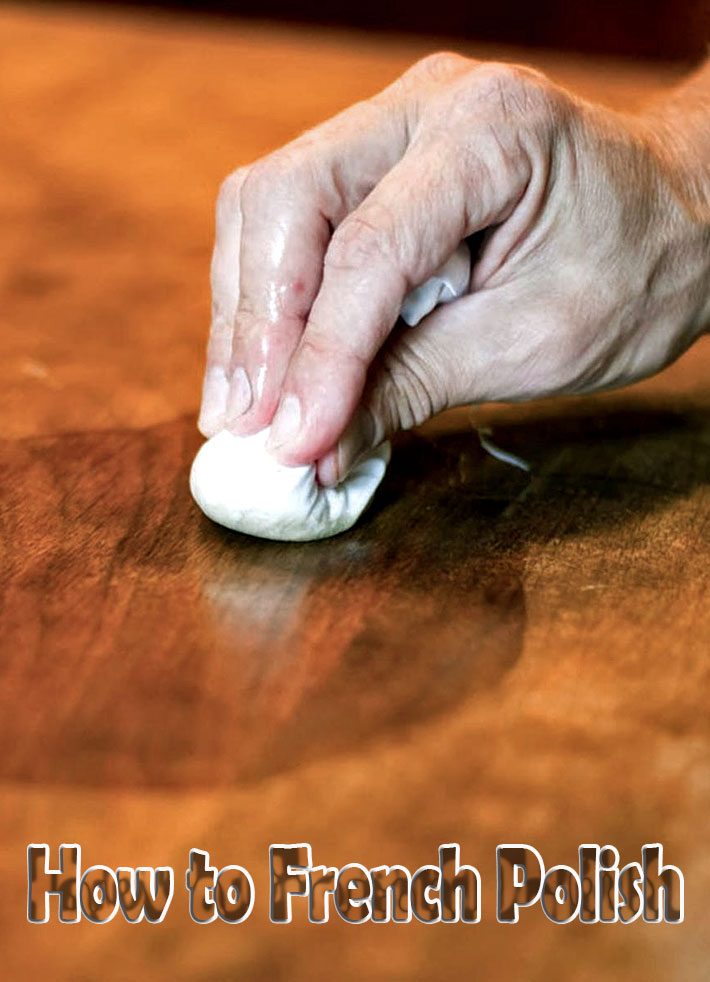
French Polish is a finish commonly found on antique furniture. It is often mistakenly referred to as a substance to be applied to wood, but in actuality is a method of applying shellac to a woodworking project that produces a tough surface with a very glossy, mirror-like finish.
French Polishing dates back as far as the Victorian era but was brushed aside early in the 20th century in favor of less labor-intensive methods of finishing.
However, this “lost art” produces a luster that is next to impossible to duplicate with mass-production methods. French Polish finishes are also very easy to repair.
Materials Needed
To apply a French Polish, you’ll need shellac, denatured alcohol, some FFFF-grade pumice, 100% extra virgin olive oil (or another pure, neutral oil), various grits of extremely fine wet/dry sandpaper, some wool or surgical gauze and some 100% cotton fabric (clean, old t-shirts work great). You’ll also want an eyedropper bottle (any pharmacy will have these), a few squeeze bottles with fine tips for the shellac and alcohol, as well as a salt shaker for the pumice.
You can use 2-lb pre-mixed shellac, but I’d recommend buying shellac flakes and mixing it yourself. The extra effort will be rewarded.
Sanding
- Begin by sanding your project thoroughly, using progressively finer grits of sandpaper (work your way up to at least a 400-grit paper).
- Wipe off all sawdust using a tack cloth.
- Next, wipe down the entire project with a slightly dampened cotton cloth. This will raise any loose wood fibers, or “hairs” that are on the surface. Allow the project to dry, then sand again with 400-grit sandpaper to knock down the hairs. Wipe the project again with a tack cloth, followed by a cloth slightly dampened with denatured alcohol.
- The alcohol will remove the last of the sawdust without discoloring the wood.
Make Your Pad
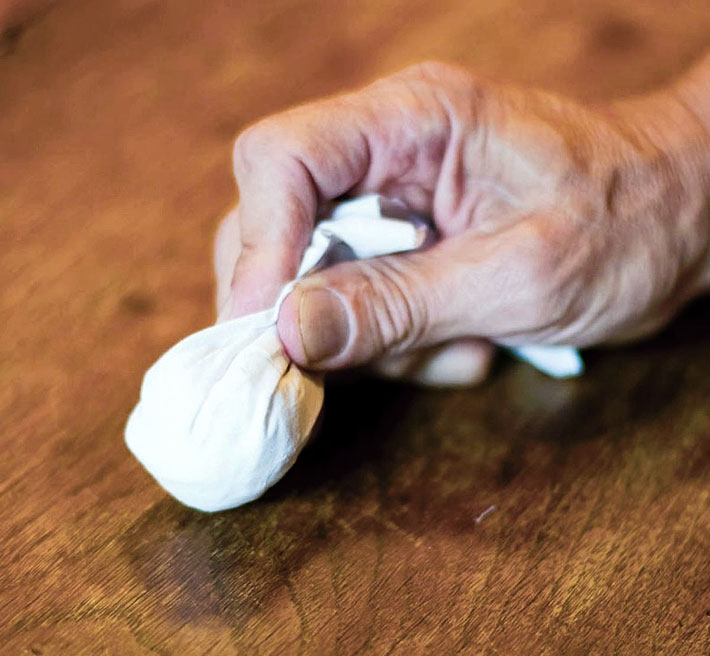
To apply the shellac, we’re going to use a pad, consisting of a tightly wadded piece of wool or gauze, surrounded by a piece of cotton fabric. To begin, make a tight ball of wool or gauze, about the diameter of a quarter. Place this ball in the center of the center of a 6″ x 6″ piece of cotton fabric, and fold the four corners up to meet at the top, forming a tear-drop shape.
The idea is that the inner core of the pad will act as a shellac reservoir. With a moderate amount of shellac stored in the core, pressing the pad onto the wood will leave a thin, even layer of shellac on the surface of the wood.
How to Use the Pad
When being applied, shellac is very sticky. As such, it can be difficult to glide the pad across the wood’s surface. To combat this problem, apply a few drops of olive oil onto the outer surface of the pad before each use. If the pad becomes difficult to glide across the surface, add a little bit more oil to the pad. (Because of the way the thin layers of shellac will dry, pure oil will rise to the surface and will not affect the finish – any impurities that are in the oil may not rise properly, so 100% pure, neutral oil such as olive oil is a necessity.)
Apply a Sealing Coat
To begin applying the French Polish finish, place some 2-lb shellac into the core of the pad. Tap or press the pad against the back of your off-hand to spread the shellac evenly throughout the core. The cotton fabric should not be saturated with shellac; we’ll want to apply extremely light, thin layers of shellac to the wood at a time, so less is more in this case.
Next, place a few drops of olive oil onto the pad as a lubricant.
The first coat of shellac will be to seal the wood, so you’ll simply wipe the pad (going with the grain) onto the wood. Ideally, you’ll want to avoid starting and stopping at any point on the stock, as this will cause an excessive amount of shellac to be applied at that point. The best method I can describe is to use a landing plane motion: sweep the pad down onto the wood like a plane landing on a runway (going with the grain).
When you reach the end of the wood, lift the plane (pad) back off of the runway. This will help prevent any unsightly blotches or marks.
As you apply this sealing coat, you may find that the cotton cover of your pad is picking up small amounts of sawdust or other fine particles that were left behind. When this occurs, replace the outer cover of your pad with another piece of cotton fabric (and a couple more drops of oil).
After applying a single even base-coat of shellac, wait a few minutes and apply a second coat in a similar manner. Repeat once more with a third base-coat. Remember to use oil to keep your pad gliding smoothly.
Store your pad in an air-tight container and allow the shellac to dry thoroughly.
Grain Filling with Pumice
Next, you’ll want to fill any cracks and smooth the surface as much as possible. With your pad’s core nearly depleted of shellac, place a new cover on your pad and add about ten drops of alcohol to the core. After evening out the pad on the back of your hand again, shake some pumice onto the surface of the pad. Work small amounts of pumice into the wood using random, circular motions (in small areas at a time). Do not work with the grain, as this will sweep the pumice out of any open pores. Continue until all pores are filled and the sealing coat is extremely smooth.
Applying the French Polish
To apply the French Polish, you’ll go back to shellac in the pad (along with a few drops of oil on a new cotton fabric cover). Begin applying extremely thin layers of shellac to the piece, working in random, circular motions with firm, but even pressure on the wood. This thin layer of shellac will dry very quickly, so you can actually apply a number of thin layers in one session. When the pad requires reloading, simply remove the pad and add more shellac to the core.
Literally, hundreds of passes all over the surface of the wood will be required to complete this step. When this objective is reached, take a break and wait a few hours to allow the shellac to dry thoroughly.
You’re going to need to repeat this entire process 6-8 times to achieve the desired finish.
Remember, always be sure to place your pad in an airtight container to save it for the next session.
Once the first layer has dried thoroughly, place a small amount of alcohol into the core of the pad and “spirit” the surface, using the same “runway” technique you used in applying the sealing coat. This step will remove the oil that has risen to the surface while the shellac was curing. The oil must be removed before applying the next coat.
Repeat the entire polishing and spiriting process until you’ve completed the desired number of sessions.
Next, examine the surface at all angles under bright light. If any blemishes in the finish need to be addressed, sand them out using 1200-grit wet/dry sandpaper and a couple of drops of oil. Remove the sawdust with a very light amount of alcohol, and continue polishing and spiriting as necessary to eliminate the blemish and even out the finish.
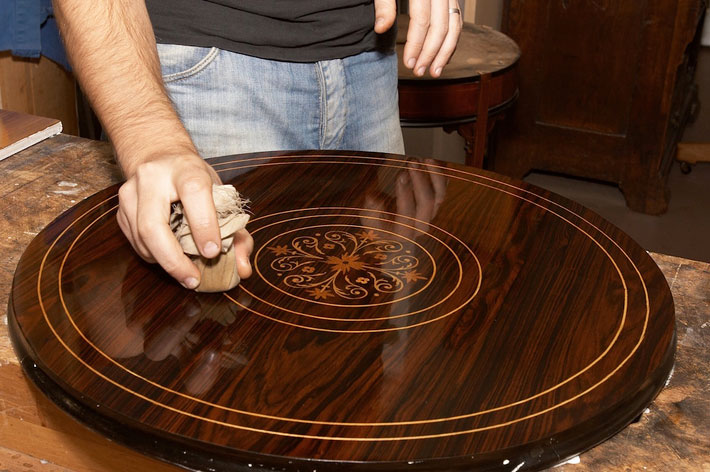
At this point, you should have a spectacular, blemish-free, mirror-like finish on your woodworking project. The French Polish is completed, and you could merely leave the project as is. However, a final glazing step will add to the luster.
Create a 1-lb mix of shellac or thin out some of your 2-lb mix. Place a small amount into the pan, along with a couple of drops of oil onto the cover, and apply this mixture using the same landing-pattern strokes at which you’re now very adept. This thinner layer of shellac will help fill any barely visible blemishes that may remain from the previous step. Be certain to pay special attention to the corners and edges of the project, as they tend to be overlooked. Add as many coats of this final glazing as necessary to reach the finished look that you desire.

Leave a Reply