
The shoulder is one of the most complex joints in your body. It is a ball-and-socket joint, allowing you to move your arm in almost every direction. However, this increased mobility also reduces the stability of the joint.
In 2006, approximately 7.5 million people were seen by a physician for shoulder problems, including injuries and sprains to the upper arm and shoulder. Shoulders injuries are often associated with athletic injuries, but they also develop with chronic repetitive motion.
For instance, if you work in a job that requires you consistently carry something in one hand, lift heavy objects overhead or use one arm consistently to push and pull (a saw for instance), you are performing repetitive movements that can lead to shoulder injuries and pain.

Anatomy of Your Shoulders
Both the shoulder and hip are ball-and-socket joints. Imagine that the top of the upper arm (humerus) has a ball stuck on the end of a long bone and the shoulder blade (scapula) has a hollowed out socket.
The ball fits within the socket and is held in place with muscle, tendons and ligaments. This anatomy allows your arm to move in all directions, across all planes.
There are muscles that attach the head of the humerus (ball) to the scapula (shoulder blade). These are called the rotator cuff. This group of muscles helps to stabilize the joint, gives your shoulder and upper arm strength and allows your arm to rotate.
There is a rim of strong connective tissue at the lip of the socket that helps keep the ball in place. This is called the glenoid labrum. The end of the clavicle (collar bone) ends just over the top of the ball-and-socket joint.
Knowing the anatomy of the shoulder joint will help you recognize some of the different shoulder injuries, what requires immediate medical attention and why strengthening this joint can help reduce the potential for acute or chronic problems.
Warning Signs
Pain and discomfort in your shoulder joint can be a result of one of the more common shoulder injuries. Most of these involve your muscles, ligaments and tendons rather than your bones. These injuries can include:
- Rotator cuff strain or tear
- Glenoid labrum tear
- Dislocated shoulder
- Frozen shoulder
- Rotator cuff tendonitis
- Broken collarbone
- Subacromial bursitis
- Osteoarthritis
- Acromioclavicular joint separation
- Scapular fracture
- Winged scapula
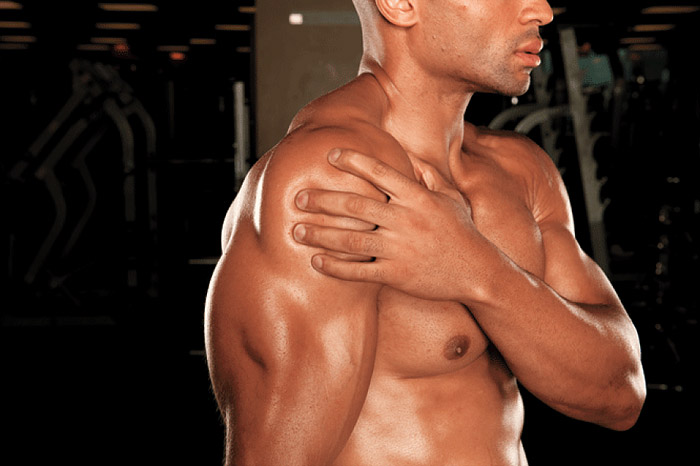
While many of the more minor injuries can be treated at home, if you have any of the following symptoms you should seek medical advice to prevent further and more permanent injury.
- Severe pain so you can’t move your shoulder
- Severe swelling around your shoulder
- An audible “pop” or “crack” you hear from your shoulder area
- Altered feeling in your hand — either numbness and tingling or loss of feeling completely
- Your shoulder looks malformed
- You feel like your shoulder is out of joint
- You can’t complete activities of daily living after 72 hours (get dressed, eat, drive, etc.)
Your shoulder joint is less stable than your other joints because it has a large range of motion over a relatively small joint surface. You may be tempted to play through the pain, but if you experience the symptoms listed above it’s important that you seek medical attention to prevent permanent damage to your shoulder.
Rehab Your Shoulder at Home
Start any rehabilitation program for your shoulder with rest, until the pain and swelling are reduced. Ice your shoulder three times a day for 20 minutes with an ice pack you can make at home.
Using a zipped bag, combine 1 to 2 cups of water (depending upon the size of the bag and the area you want to cover) with one-eighth cup of isopropyl alcohol.
Place this bag inside another zipped bag to prevent leaking. The isopropyl alcohol will prevent the water from freezing into a block of ice and allow you to form the bag around your shoulder. This bag of ice will also stay cold longer than most store-bought ice packs and can be reused over and over again.
Place the ice pack over your shoulder with a towel or your shirt between the pack and your skin to prevent damage to your skin cells.
Exercise Improves Strength and Reduces Pain
An ounce of prevention is worth a pound of cure. Keeping your shoulders strong and stable reduces the possibility that you’ll experience an injury. Strong shoulders and upper back also improve the way your clothes fit and keep you ready for sleeveless shirts all year round.
Here are some simple exercises you can use to improve the strength of your shoulder muscles and provide more stability to the joint. The only equipment you’ll need is an exercise band or lightweight dumbbells, or you can choose to do just the bodyweight exercise
1.Planks
This is a simple, no-equipment-needed exercise you can do anywhere. It is static, meaning you achieve the correct position and then stay there for the length of the exercise. It primarily works your core, glutes, shoulders and upper back. There are several variations, working different muscle groups and having different degrees of difficulty. The standard plank is done on the floor in classic straight-arm, push-up position.
Lay flat to the floor, plant your hands directly under your shoulders, push your toes into the floor and contract your gluteal muscles to stabilize your lower back.

If you feel strain in your lower back during the exercise, tilt your pelvis down, contract your gluteal muscles and raise your buttocks slightly. Rise to a push-up position, with your back completely flat and looking approximately 6 inches in front of your body.
Do not lock your knees or elbows to avoid damaging the joints. Start by holding this position for 20 seconds while keeping good form. Do planks at least four times a week and build up to holding for 90 seconds using good form.
Variations include holding your body up on your forearms instead of your hands or being on your knees instead of your toes. The knee plank is noticeably easier. You should start with this position if you aren’t able to hold a straight arm or forearm plank for 20 seconds.
2.Push-ups
This is another simple and effective exercise you can do without any equipment. There are several variations with varying degrees of difficulty. The classic push-up requires that you start in a straight-arm plank position, described above. Do not lock your elbows or your knees to prevent joint damage.
Lower your body by bending your elbows until your chest grazes the floor. Keep your head and neck in a neutral position by looking at a point 8 to 12 inches in front of you. Keep your back straight and do not break form. As you lower your body to the floor, keep your elbows tucked close.
Do not allow them to flare out to prevent damage to the joint. As you raise your body back to the plank position, keep your back straight, glutes tight and eyes forward.

If you experience pain or strain in your lower back, tilt your pelvis forward, tighten your glutes and raise your buttocks very slightly. Inhale on the way down and exhale on the way up. Try to start with five push-ups four times a week until you can work up to at least three sets of 10 push-ups.
Variations include doing them from a knee plank position to reduce the degree of difficulty as you start doing push-ups. When you are looking for a greater degree of difficulty, you can do incline push-ups by placing your hands on the second step on stairs or decline push-ups by placing your feet on the second step of stairs. Ensure that your feet are firmly planted so they don’t slip.
3.Standing Rows
Rows are commonly done with exercise or resistance bands. They can also be done with dumbbells. Resistance bands usually come with a light, medium or heavy resistance. If you aren’t sure of your current strength, pick the light band. You can easily work up to the heavier band and will prevent getting injured and sidelined before you really get started.
Holding the bands by the attached handles, place the band on the floor and stand directly in the middle of the band with both feet slightly apart. Bring the handles together, one over the other, and hold them with both hands. Stand up straight and tall. Contract your glutes and tilt your pelvis forward to protect your lower back.
Standing straight, lift the handles up to your chin and bring your elbows above shoulder level. Inhale as you bring the handles up and pause for two seconds, holding the bands in place. Exhale as you slowly let your hands drop back to the starting position. By moving slowly on both the upward and downward movements, you’re working your shoulder muscles in both directions.
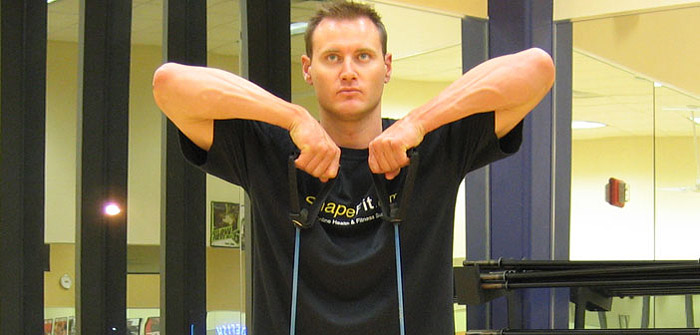
Another position for upright rows is to stand on the bands as described above. Bend at your hips (not your waist) approximately 30 degrees. Hold one handle of the bands in each hand, keep your back straight, and pull the handles up to your chest. Your elbows should remain tucked in toward your body and you should be squeezing your shoulder blades as you pull the handles toward your chest.
At the end of 12 to 15 repetitions, your arms and shoulders should be tired. Start with one set and work up to three sets, three times a week.
4.Reverse Fly
The reverse fly is done with exercise bands also. You’ll want to use the lightest resistance to start, as these muscles in your shoulders are often the weakest and least used.
Start in the same position as a standing row described above. Next bend at your hips at approximately 30 degrees, keeping your back straight. Hold one handle of the bands in each hand, directly in front of your legs. As you inhale, pull your arms out to your sides like they are wings. Keep your arms straight but do not lock your elbows, which will help protect your joints.
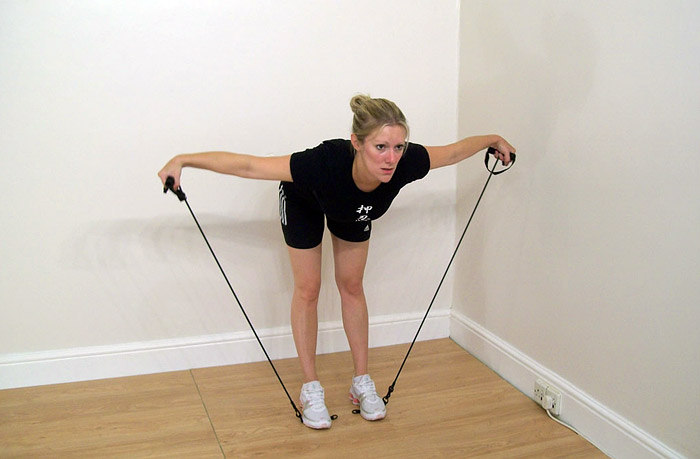
Hold this position for the count of two and then return slowly to the start position. Hold at the start position for the count of two and repeat. The movement of bringing your arms out to a wing position and returning to the start position is one repetition. Do one set of 12 repetitions to begin and work up to doing three sets of 12 repetitions.
5.Empty the Can
This exercise can be done with a small dumbbell or even a can of soup. You’ll be working the muscles at the top of your shoulders and your upper back to help stabilize your shoulder joint.
Start by standing straight, feet hip-width apart, pelvis tucked forward, and glutes contracted to support your lower back. Holding a can or small dumbbell in your hand, hold your arm straight to your side with your thumb against your thigh. Raise your arm to the side to 90 degrees, so your arm is straight out to your side. Do not raise it above shoulder height.
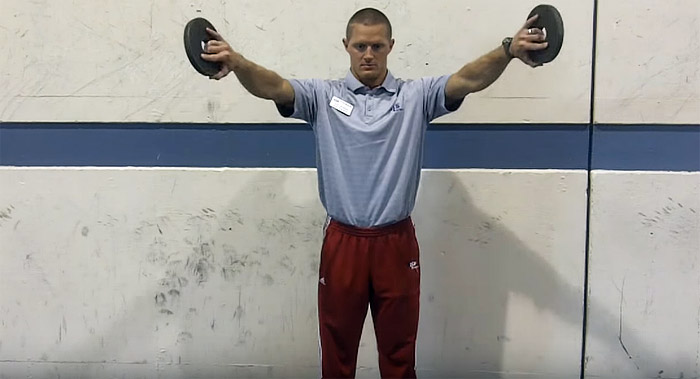
Start with no more than a 2-pound weight because these are muscles not frequently used. Begin with one set of 10 repetitions, three times a week. You can work up to three sets of 10 repetitions, three times a week with a 5-pound dumbbell. However, you’ll want to progress slowly as your muscles strengthen so you don’t injure yourself as you’re trying to protect your shoulder joint.



Greetings! Quite helpful guidance on this post! It’s the small changes that make the largest changes.
Thanks a lot for sharing!
OUTSTANDING Post.thanks for share..more wait.