Planting Arrangements
Arranging vegetable plants within your garden area depends mainly on the amount of space and time you have available and the types of crops you choose to grow. You can maximize your garden space by planting several rows. Use this spacing to separate plants in the same row and between rows. Plants will be almost touching when they are fully grown. For small plants such as lettuce, radishes, and spinach, plant four to six rows together. For plants that are knee high, plant two or three rows together. For taller plants, such as corn, plant in a single or double row. You do not need walking room next to each row, but you do need enough space to reach every plant for harvest.
Row Planting
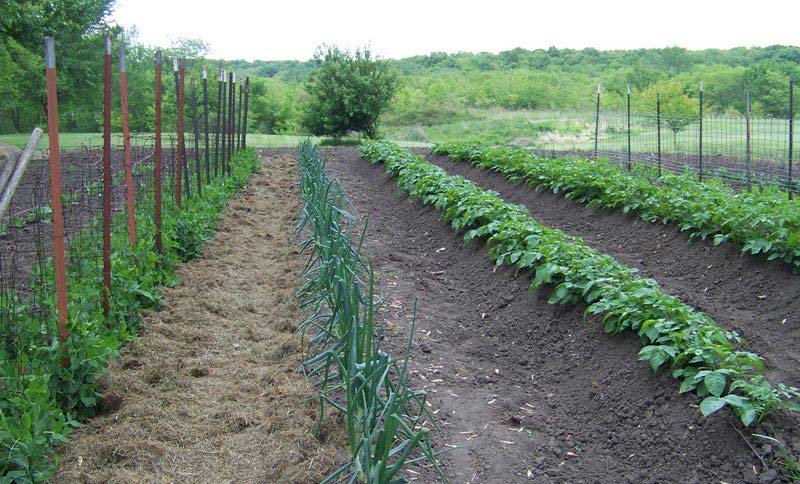
The planting of crops in long rows started when livestock were used to cultivate gardens. Out of tradition, many gardeners still grow their vegetables in rows. Row planting may be the most efficient planting technique if you mechanically seed and weed your garden, but beds are more space-efficient and weed control is more effective when crops are closer together.
Raised Beds
Raised beds are ideal for growing most vegetables and the yield per square foot is often greater than that from single rows. The use of raised beds allows you to concentrate soil preparation and fertility in small areas, resulting in effective use of soil amendments. A higher percentage of the available growing space is used, there is less room for weeds to grow, and water can be used more efficiently. Raised beds are a good choice for perennial crops in wet areas to ensure that the soil around the plants remains well-drained throughout the winter.
The width of a raised bed should allow you to reach from both sides into the middle of the bed (e.g., 3–4 feet). The length of the bed should fit the available garden space and your need to move around the ends. If you are gardening with children, shorter beds may be best to allow easy access. Beds can be built up by adding compost and mixing it together with soil. This improves the soil structure and is especially effective if the native soil is compacted or poorly drained.
Raised beds improve drainage by allowing water to drain from the bed into the alleyway through the force of gravity. A drier soil warms sooner and stays warmer longer, allowing for earlier spring planting and later fall production. Depending on how tall you make your beds they can also be easier to plant, weed, and water. Raised beds can be placed on hard surfaces, slopes, and rooftops to make use of space that would normally be considered unusable for gardens. To create a raised bed, first remove all grass and weeds from the area. Place a layer of compost 4–6 inches deep on the ground so that it covers the desired width and length of the bed. Remove the topsoil from the surrounding four sides and place on top of the compost. Place 2 inches of fresh compost on the surface of the bed before planting each season’s crop.
Unframed beds
It is not necessary to frame a raised bed. Having an unframed bed allows you to change the bed shape and location each year, and costs less to build. Unframed beds need to be re-shaped each year, which you can easily do by raking any soil and compost that may have slipped or washed into the alley way back onto the bed.
Wood-Framed beds
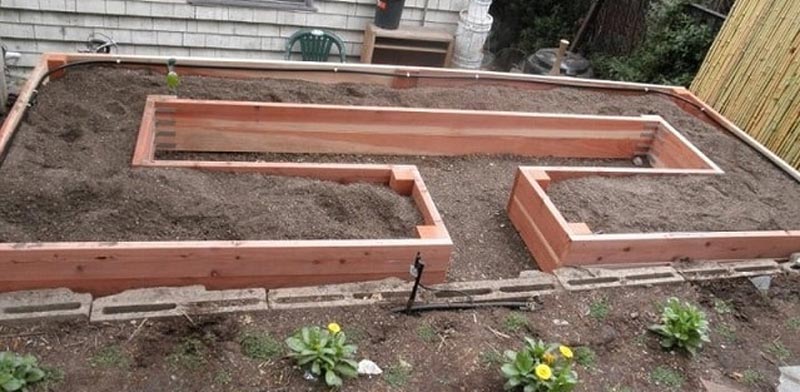
Wood is the traditional material used to construct frames for raised beds. Untreated wood will last several years, while treated wood can last twice as long. Today, treated wood that does not contain toxic chemicals is available; be sure to select this type of treated wood to frame your raised beds. Alternatively, plastic lumber and galvanized metal are useful for framing raised beds because they are longer-lasting. These materials are also lighter than wood, and therefore can be more easily moved from one location to another if needed. To construct a framed raised bed, first level the ground on all sides of the bed so that the soil does not wash out under the frame.
Straw bale beds
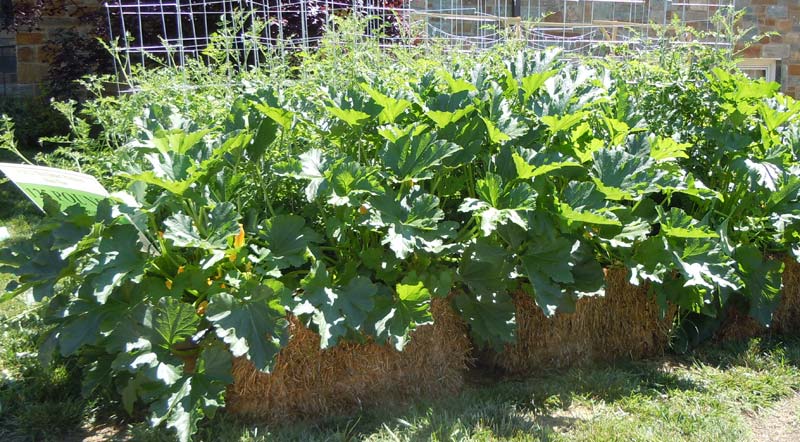
In a straw bale garden, the crops are grown in the tops of straw bales, creating a raised bed that is a convenient height for care and harvest. Straw bales are placed on the soil surface and there is no need to dig into the soil, which can be very useful if your garden soil is unsuitable for growing vegetables. Use bales made from straw, not hay, to make a straw bale garden. (Straw is the stem of a grain plant that has been cut after the grain has been harvested, whereas hay is the whole plant harvested while still somewhat immature. Hay usually contains many seeds which will sprout into weeds.) To construct a straw bale bed, place the straw bales in the area where they will be used, as they will be too heavy to move after you prepare them for planting.
To prepare the bales for planting (also called conditioning), wet the bales thoroughly for 7–10 days so they are saturated. This will start the decomposition process, which is necessary to prevent the bales from heating after your planting is complete. Let the bales rest for 3–5 days, then add 3 inches of a 50/50 compost and soil mixture to the top of the bale. Straw does not hold water as well as garden soil, so be sure to water frequently throughout the growing season, especially when it is hot or dry.
Straw bales are best-suited for crops that grow to a medium height and develop a relatively deep rooting system, such as tomatoes, peppers, eggplant, squash, melons, and herbs. Potatoes and other vegetable crops that have the edible portion below ground are not well-suited for growing in straw bales. Tall crops such as corn do not work well in straw bales because the plants will fall over.
Square Foot Gardening
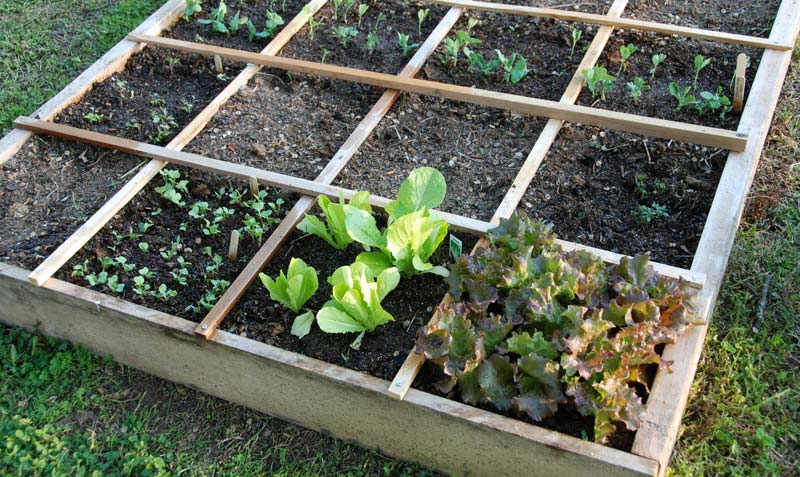
This method of intensive gardening is best suited to crops that are planted close together, and can be used with raised beds or flat areas. Arrange the plantings in 1-foot squares to maximize space and make it easier to plan how much of each crop you will grow. Plant each square with a different crop. The mixtures of crops can also provide visual appeal in the garden.



Leave a Reply