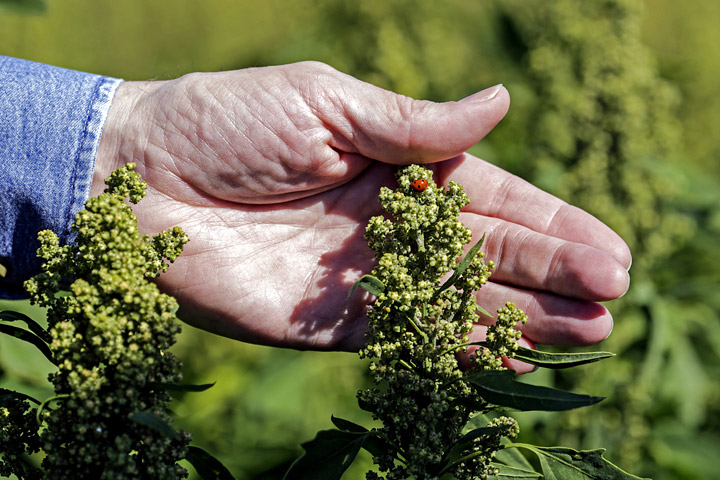
Delicious, nutritious, antioxidant rich, and full of much-needed magnesium, quinoa has rightfully become one of the most popular health foods around.
But quinoa can also be quite pricey, and it’s hard to know sometimes where your store-bought quinoa is coming from and exactly how it was grown. That’s why you should try growing your own! It’s easy; quinoa isn’t a very demanding plant to grow and will survive in many climates.
Quinoa Health Benefits
As mentioned above, quinoa is an excellent superfood. It’s gluten-free, high in protein, rich in vitamins, minerals, and amino acids, and high in fiber!
Interestingly, it’s not a grain as some believe. In fact, it’s actually a vegetable! The seeds of the quinoa plant are what’s known as quinoa, and they contain proteins not found in other grains!
Quinoa Facts
Quinoa, a species of goosefoot (Chenopodium), is a grain-like crop grown primarily for its edible seeds. It is a pseudocereal rather than a true cereal, or grain, as it is not a grass. As a chenopod, quinoa is closely related to species such as beets, spinach and tumbleweeds. Its leaves are also eaten as a leaf vegetable, much like amaranth, but the commercial availability of quinoa greens is currently limited.
Quinoa originated in the Andean region of South America, where it has been an important food for 6,000 years. Its name is the Spanish spelling of the Quechua name. Quinoa is generally undemanding and altitude-hardy, so it can be easily cultivated in the Andes up to about 4,000 meters. Even so, it grows best in well-drained soils and requires a relatively long growing season. In eastern North America, it is susceptible to a leaf miner that may reduce crop success; this leaf miner also affects the common weed and close relative Chenopodium album, but C. album is much more resistant.

Similar Chenopodium species, such as Pitseed Goosefoot (Chenopodium berlandieri) and Fat Hen (Chenopodium album), were grown and domesticated in North America as part of the Eastern Agricultural Complex before maize agriculture became popular. Fat Hen, which has a widespread distribution in the Northern Hemisphere, produces edible seeds and greens much like quinoa but in lower quantities. When grown in heavily fertilized fields, it can accumulate dangerously high concentrations of nitrates.
Quinoa Growing Guide
Quinoa grows best where maximum temperatures do not exceed 90°F (32°C) and nighttime temperatures are cool. For most southern Canadian and northern U.S. sites, the best time to plant quinoa is late April to late May. When soil temperatures are around 60°F (15°C) seedlings emerge within three to four days. However, when quinoa seeds are planted in soil with night-time temperatures much above that, quinoa, like spinach, may not germinate. In this instance, it’s best to refrigerate seeds before planting.
Quinoa is a warm season crop that requires full sun. Best germination occurs when soil temperatures range from 65 to 75°F (18-24°C). For southern Canada and the northern U.S., this usually means a late May or early June planting.
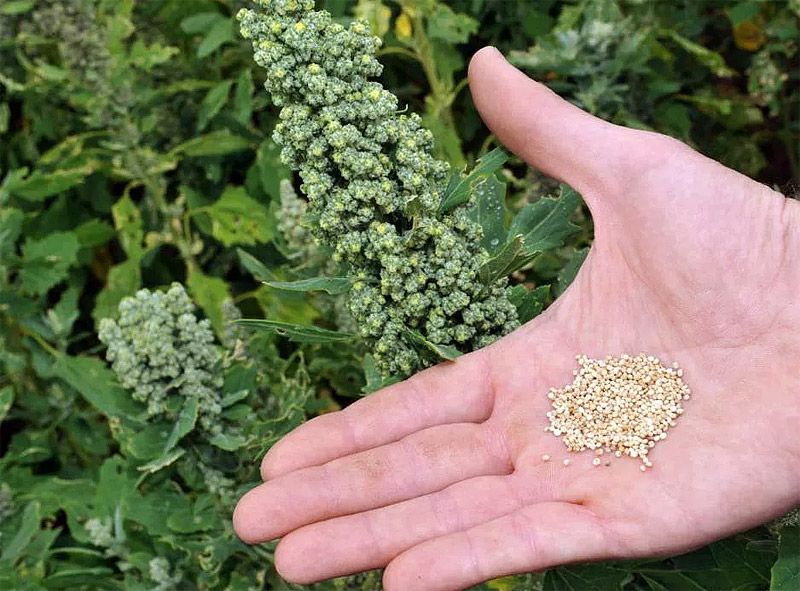
The small seeds of amaranth and quinoa will germinate more successfully with a finely prepared surface and adequate moisture. Seeds should be sown no more than one-quarter inch deep in rows one and a half- to two-feet (45-60 cm) apart or wide enough to accommodate a rototiller between the rows without damaging the plants. Planting can be done by hand or with a row seeder. Plants should eventually be thinned 6 to 18 inches (15-45 cm) apart. (Thinnings make great additions to salad.)
One gram of seed will sow 50 feet (15 m) of row. An acre requires about one pound of seed.
Maintaining
Quinoa resembles lamb’s-quarters and amaranth resembles red-rooted pigweed, especially in the early stages of growth, so it is best to sow seed in rows to make weeding less confusing. Sowing amaranth cultivars with purple leaves also simplifies weeding. Since seed is small, you can avoid considerable thinning by mixing it with sand or radish seed before sowing, as is sometimes done with carrots. Amaranth and quinoa are low-maintenance crops but weeds, especially at the beginning, should be discouraged by cultivation or mulching.
Soil moisture is probably sufficient until early June to germinate the seed. Given good soil moisture, don’t water until the plants reach the two- or three-leaf stage. Quinoa and amaranth appear slow growing at first but both are extremely drought tolerant and do well on a total of 10 inches (25 cm) of water or less. As the plants reach about one foot in height, they start to grow very rapidly, the canopy closes in, weeds are shaded out and less moisture is lost through evaporation.
You may have noticed occasional lamb’s-quarter or amaranth weeds succumbing to munching by insect larvae in the flowerheads and the same is sometimes true of their cultivated cousins. This won’t have any serious impact on the harvest.
Harvesting Guide
Quinoa is ready to harvest when the leaves have fallen, leaving just the dried seedheads. Seeds can be easily stripped upwards off the stalk with a gloved hand. Quinoa resists light frosts especially if the soil is dry. So long as maturing seed is past the green stage, frost will cause little damage and harvesting can be done a day or two later. Extreme hot weather and warm nights inhibit fruit set. It is important to watch the weather when quinoa is ready to be harvested: if rained on, the dry seed can germinate. If the heads are not completely dry, harvest them when you can barely indent the seeds with your thumbnail. They should then be thoroughly dried before storage.
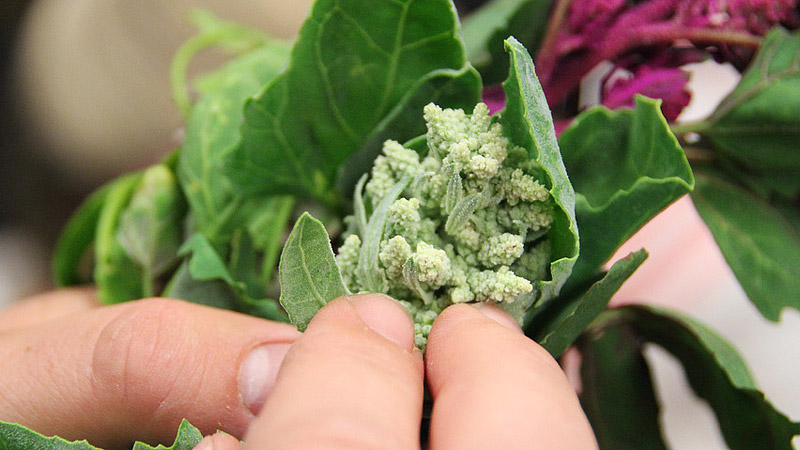
Amaranth keeps on flowering until hit by the first hard frost. Seed will often ripen many weeks before that, usually after about three months. The best way to determine if seed is harvestable is to gently but briskly shake or rub the flower heads between your hands and see if the seeds fall readily. (Numerous small and appreciative birds may give hints as to when to start doing this.) An easy way to gather ripe grain is, in dry weather, to bend the plants over a bucket and rub the seedheads between your hands. My own preferred threshing method is to rub the flowerheads through screening into a wheelbarrow and then to blow away the finer chaff using my air compressor. Cutting and hanging plants to dry indoors does not work very well: the plants become extremely bristly and it is difficult to separate the seed from the chaff.
The best time to harvest amaranth commercially is in dry weather three to seven days after first frost—a condition not easily met in many places. Most presently available varieties maintain too high a moisture content to be harvested mechanically before a killing frost.
Clean quinoa and amaranth with screens, by winnowing, with a fan or other blowing device. After harvesting, it is important to further dry your crop to ensure it won’t mold in storage. It can be left on trays in the hot sun or placed near an indoor heat source. Stir occasionally until it is as dry as possible. Store seed in air-tight containers in a cool dry place.
Saving Seeds
Amaranth and quinoa cross with their wild relatives, so it is important to weed out red-rooted pigweed and lamb’s-quarters if you want to maintain pure seed. Amaranth cultivars will cross with each other as will quinoa cultivars, so grow only one kind of each or separate cultivars by as much distance as you can. Certain varieties, such as purple-leaved amaranth, are easier to select for than others. Lamb’s-quarters has a greater branching habit than quinoa and smaller flowerheads.

Leave a Reply