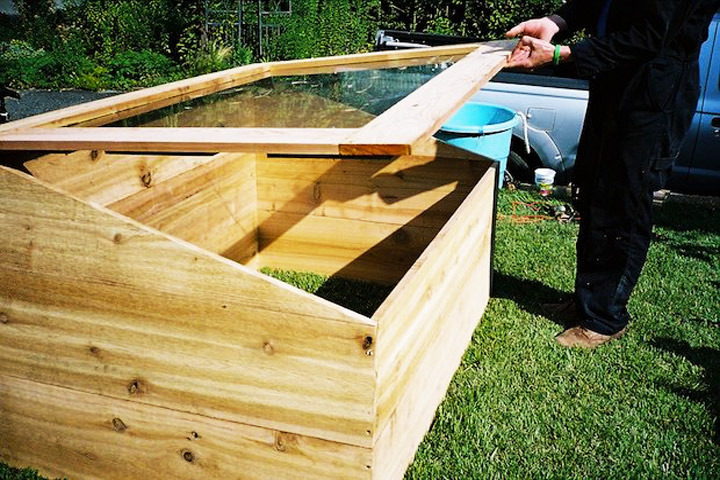
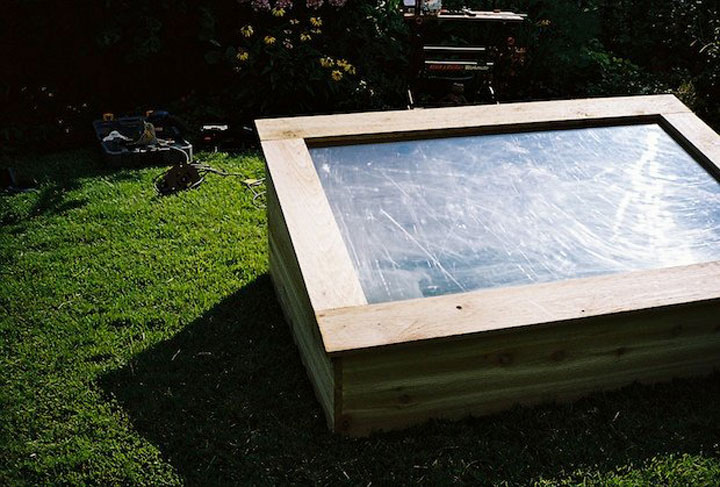
How to Build Your Own Mini Greenhouse
Gardeners looking to extend the growing season into winter can do so with a cold frame. These handy mini greenhouses trap heat and keeping cool-season veggies growing in spite of frosty weather. Cold frames are inexpensive to build and don’t consume a lot of energy. They yield fresh, local vegetables when mediocre grocery store fodder is being shipped from afar. Fall is the perfect time to build a cold frame and start planting.
This modular cold frame design offers two frame options: single- and double-tier. Each meets different site conditions. Use the single-tier for open sites with few weed and tree root encroachment problems. Add the root-repelling second-tier if root competition is an issue.
Deeply till or double-dig the soil before planting and supplement with rich compost. Salad greens and annual herbs are great for cold frame culture, as are cool-season root crops like carrots, radishes and turnips. Plant in early fall for late-fall to early-winter harvest.
The lid should be kept shut on cold days and propped open for ventilation on unseasonably warm days. Keep the soil beneath evenly moist, but not wet. Fertilize with an organic all-purpose slow-release.
Cold frame materials for mini greenhouse:
Construction time : 6 hours
- One 36-inch x 57-inch Lexan sheet
- Five 10-foot, 1 x 12-inch and two 10-foot, 1 x 6-inch cedar boards; one 8-foot 1 x 6-inch cedar board for braces
- 20 31⁄2-inch No.10 exterior-grade screws
- Two 3-inch heavy-duty galvanized steel hinges
- 13 size # 20 wooden biscuits
- Hand tools: saw, measuring tape, pencil, set square, 2-strap clamps, straight edge ruler
- Power tools: drill, table or circular saw fitted with a universal blade, miter saw, biscuit cutter
Wood selection:
Cedar is best. It’s lightweight, rot and warp- resistant, and available in convenient sizes. Cedar splits easily, so choose smooth, solid boards without knot holes. Avoid pressure- treated lumber or fast-rotting softwoods.
Woodcutting:
Each 10-foot, 1 x 12-inch board will yield one 60-inch front/back panel and one 40-inch side panel. Mark out the dimensions with a pencil and set square and cut with the table or circular saw
For the two-angled side panels, choose the most flawless 40-inch side panel and mark a diagonal line lengthwise, from corner to corner. Saw down the center of the marked line.
Set the saw to a blade angle of 15 degrees and run the center of the blade down the inside of the outer edge of the upper back panel. This will form an angled edge on the frame’s back, which will match the side panels and allow the lid to close; a precision cut that does not reduce board width is essential.
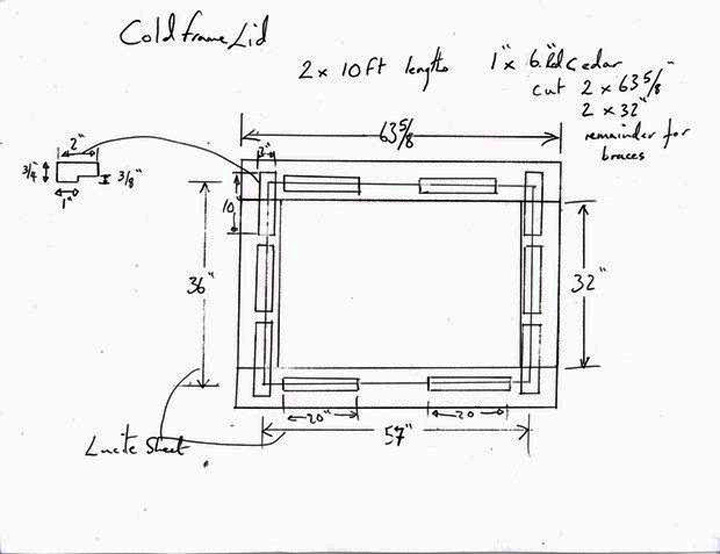
Cut the lid pieces from the 1 x 6-inch lengths of cedar. Use a miter saw to ensure the ends of the sidepieces are perfectly square.
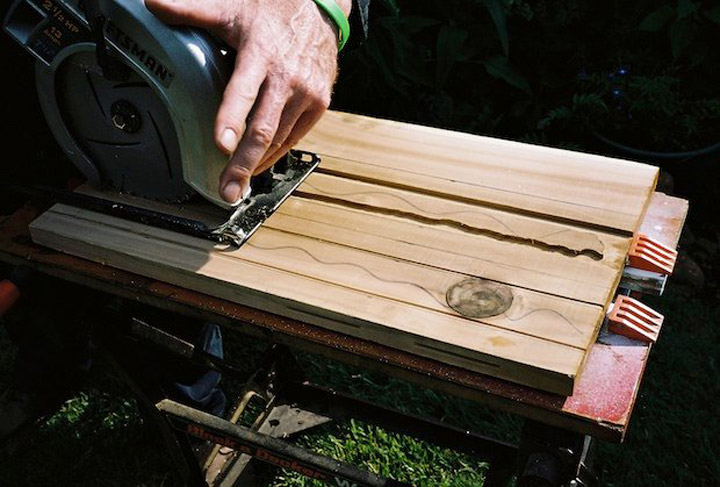
Fabricate lid clamps for the window from remnants of the 1 x 12-inch panels. Make two clamp sizes: 2 x 10 inches and 2 x 20 inches. Mark the 20-foot remnants lengthwise at 1-inch, 2-inch and 1-inch increments. Run a circular saw (set at 1⁄4-inch depth) down the edges of the 2-inch center section and use a router, fitted with a blunt end cutter, to form a 3/16-inch (deep) x 2-inch (wide) trough. Finally, mark a line down the trough’s center and use a saw to create the 2-inch-wide strip.

Assembly:
Step 1
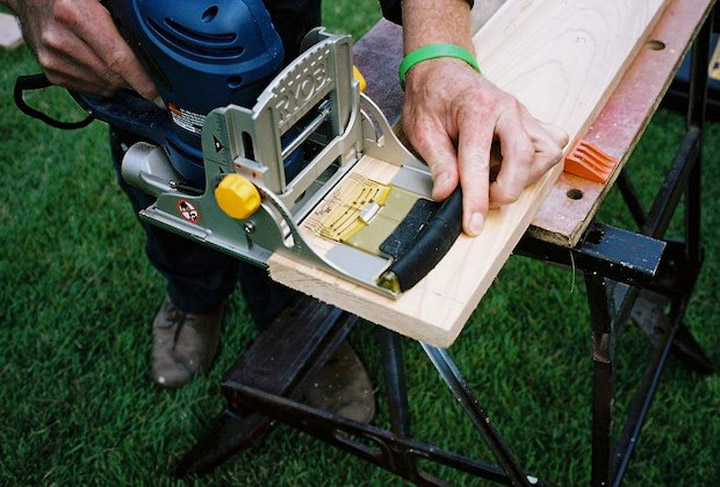
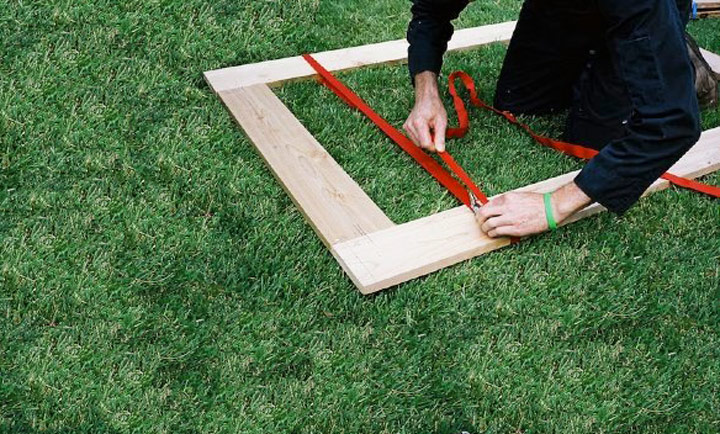
Wooden “biscuits” facilitate assembly of panels and lid pieces. To prepare cutting biscuit slots, align pieces that will be assembled to create the front, back, sides, and lid on a flat surface. With a pencil and straight edge, mark across the panel joints at the center points for each biscuit slot. On the front and back, place marks 15 inches from each corner and another in the center (30 inches). On the sides, mark the biscuit centers 14 inches from each corner; only 2 slots will be used for the sides. For the lid, which will join with butt joints, mark the center of each sidepiece. Cut slots once all marks are made and the biscuit cutter is adjusted to produce slots at the center line of the board edges.
Step 2
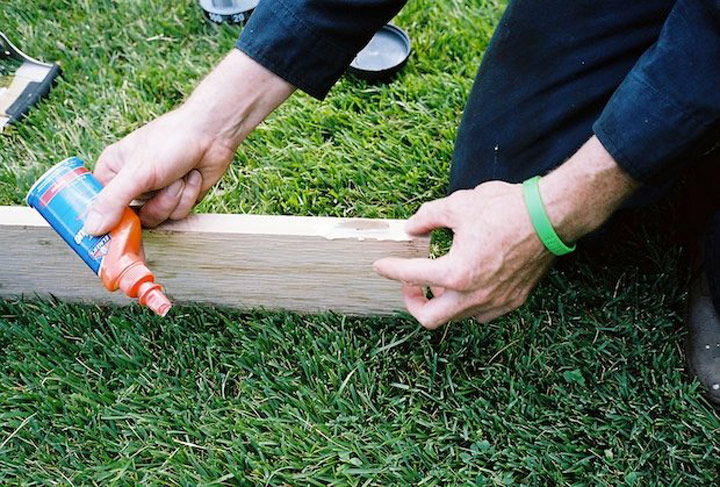
Align lid pieces on a flat surface and apply outdoor grade wood adhesive to the biscuits and mating surfaces. Hold the assembly together with strap clamps and set aside to dry.

Step 3
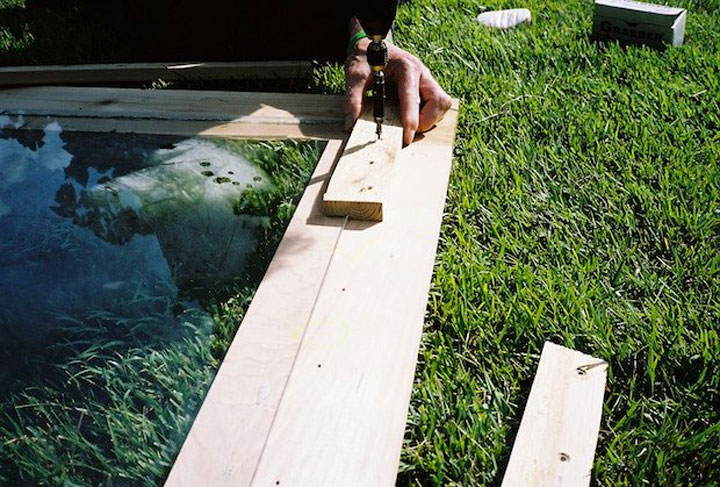
Starting with the bottom panels, assemble the cold frame one tier at a time. (Pre-drill to avoid splitting.) On a flat surface, align the corners of the panels to be joined and drill 1/8-inch pilot holes 3 inches from the bottom edge and 3 inches from the top edge of the sides. Holes must be perfectly centered to join correctly. Lubricate the screws with a coating of bar soap and use a power driver (clutch on low setting) to slowly drive them in. Tighten until screw heads are just flush with the surface and not beyond.
Step 4
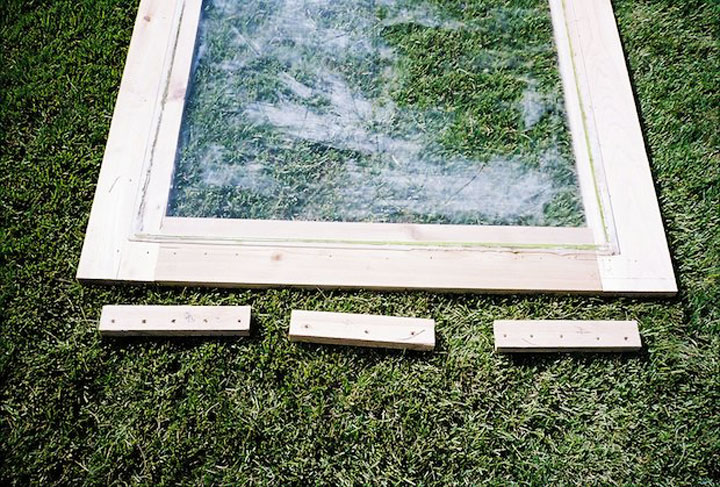
Once the lid frame has dried, align the Lexan® sheet and clamp into place. Clamps hold the sheet in place and act as braces to reinforce the joints between the lid components.
Step 5
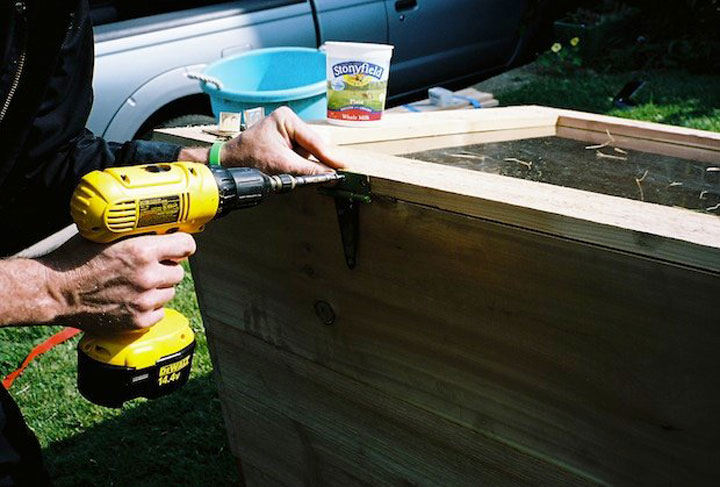
Place the lid on the cold frame body, aligned and connected with hinges placed 15 inches from the ends of the back panel.
Step 6
Brace the sections of the cold frame together with 1×6-inch cedar boards that run perpendicular to the front and rear panels. Brace length and positioning is dependent on the configuration of the modular cold frame.
The modular design allows two configurations. The single-tier—with the cold frame base buried 2 to 3 inches below the soil surface—is ideal where root encroachment is not a problem. Add the second tier if roots are an issue. Dig a hole large enough to accommodate the entire lower tier and sink it. Line the soil with porous Weed Block fabric beyond the edges of the frame before burying.

Source www.good.is / by Wilder Quarterly

DIY Winter Room Decor
9 years ago

10 Essential Tools for any DIY Project
9 years ago

DIY Homemade Sea Salt Soap
8 years ago
Leave a Reply