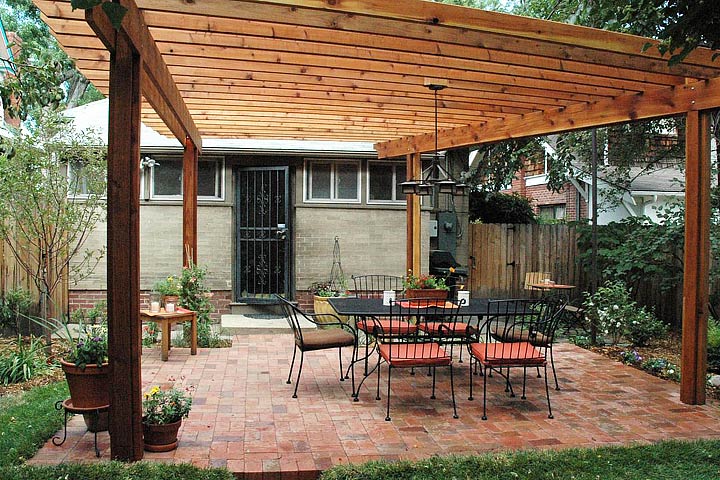
Manufactured brick pavers are a durable and inexpensive material choice when installing a brick paver patio.
TOOLS
- rake
- spade
- hand tamper
- rubber mallet
- broom
MATERIALS
- gravel
- plastic edging
- 12″ spikes
- 2×4 board
- sand
- brick pavers
Step 1. Prepare the Base

After locating and marking the outline for the brick paver patio, set stakes at the four corners. Excavate the area within the stakes to a depth of 8 inches. Spread gravel over the entire area, rake smooth and tamp down to a level surface using a hand or power tamper.
Step 2. Install Edging
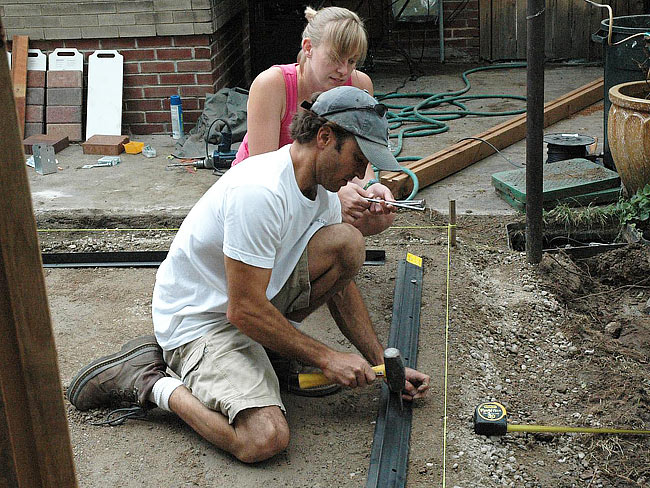
When the gravel base is compact, measure and cut plastic paver edging to the required length to secure pavers. Lay the edging along the outside border of the patio. Secure in place by hammering 12” spikes through edging into the ground.
Step 3. Add Sand
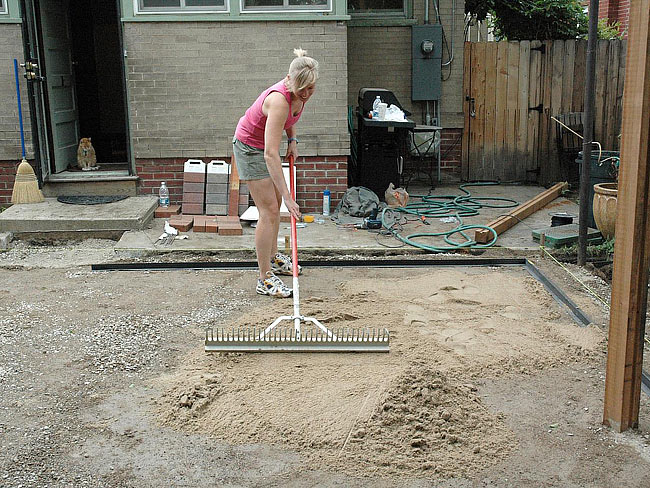
Pour sand over the entire area inside the edging to a depth of 1″. Use a rake to evenly distribute it. Using a horizontal 2×4, smooth out and level the surface of the sand.
Step 4. Lay Pavers
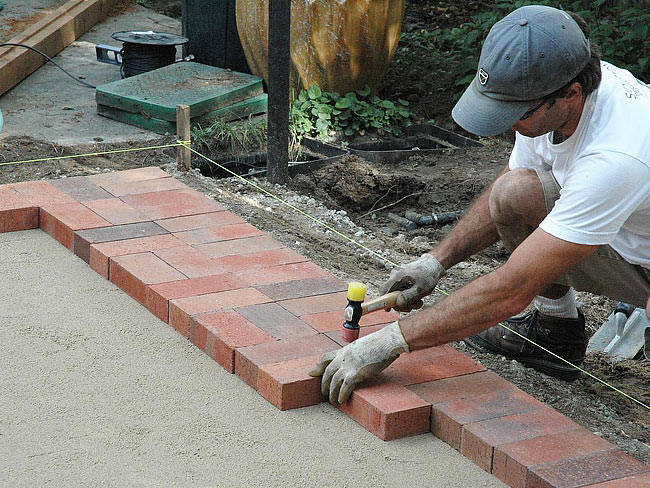
Starting at the edging border, begin laying brick pavers. Use a rubber mallet to tap pavers into place. Continue laying pavers following any numbers of patterns until the area is complete. For any irregular spaces, it may be necessary use a hammer and cold chisel to cut them to size.
Step 5. Fill Joints

Spread a thin layer of sand over the entire patio and use a push broom to work it into the gaps between pavers. Soak the patio with a gentle spray of water to help settle the sand into the gaps. Repeat the process until the sand fills all the gaps. Run a tamper over the patio to set the bricks.



This is a really nice looking brick patio you created. I couldn’t do something like that, where the colors are all sparsed randomly but still look good. My OCD would kick in and I would try to put all the similar colors together or something.