Menu

  • Home
  • Garden
    • Big Gardens
    • Small Gardens
    • Vegetables and Herbs
    • Yard and Backyard
    • Gardening Tips
    • Ornamental Plants
    • Indoor Plants
  • Home Design
    • Living Room
    • Kids Room
    • Bedroom
    • Home Office
    • Kitchen
    • Bathroom
    • Home Decor
    • Architecture and Design
    • All About Home
  • Interesting
    • Positive Stories
    • Interesting News
    • Stories Behind the Photographs
    • Odd News
  • Health & Beauty
    • Hairstyles
    • Makeup
    • Diet
    • Lifestyle & Mental Health
    • Fitness & Weight Loss
    • Beauty Tips
    • Health Tips
  • Recipes
    • Meals
    • Healthy Recipes
    • Desserts and Cakes
    • Cookies and Snacks
    • Keto Recipes
    • Video Recipes
  • DIY
    • DIY Ideas
    • DIY Tutorials
  • Pets
    • Cats
    • Dogs
    • Rodents
    • Aquatic Pets
    • Birds
    • Funny Animal Videos

DIY – Building Paths with the Walkmaker

20
May
DIY – Building Paths with the Walkmaker
By Nightlight
/ in DIY,DIY Tutorials,Yard and Backyard
/ tags DIY, DIY Tutorials
0 Comments

Tools

  • Excavation and site preparation tools
  • QUIKRETE Walkmaker form
  • wheelbarrow or mixing box,
  • shovel
  • level
  • margin trowel or finishing trowel

Materials

  • Concrete mix or crack-resistant concrete mix
  • liquid cement color
  • plastic sheeting
  • polymer-modified jointing sand

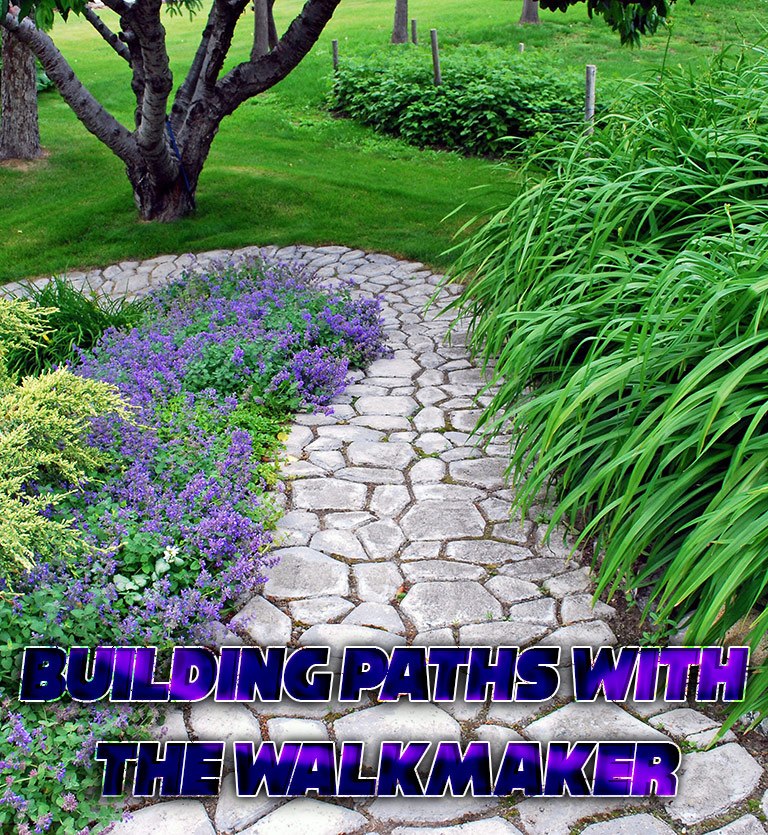
A well-made walkway or garden path not only stands up to years of hard use, it enhances the natural landscape and complements a home’s exterior features. While traditional walkway materials like brick and stone have always been prized for both appearance and durability, most varieties are quite pricey and often difficult to install. As an easy and inexpensive alternative, you can build a new concrete path using manufactured forms as a Walkmaker. The result is a beautiful pathway that combines the custom look of brick or natural stone with all the durability and economy of poured concrete.

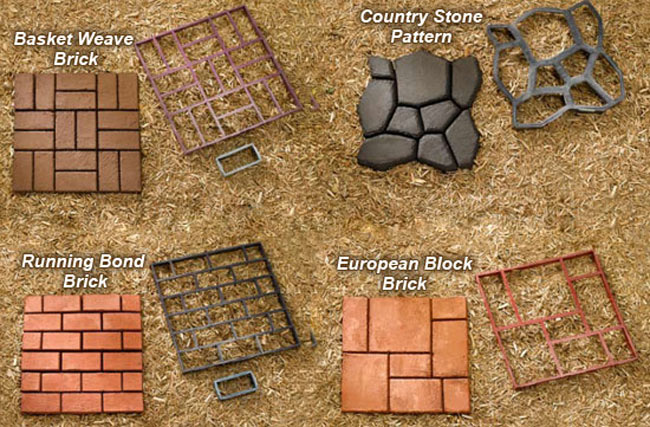
Walkmaker types
DIY - Building Paths with the Walkmaker

Building a path is a great do-it-yourself project. Once you’ve laid out the path, you mix the concrete, set and fill the form, then lift off the form to reveal the finished design. After a little troweling to smooth the surfaces, you’re ready to create the next section—using the same form. Simply repeat the process until the path is complete. Each form creates a section that’s approximately 2-ft. sq. using one 80-lb. bag of premixed concrete. This project shows you all the basic steps for making any length of pathway, plus special techniques for making curves, adding a custom finish, or coloring the concrete to suit your personal design.


Estimating Concrete for Your Project

DIY - Building Paths with the Walkmaker

How to Create a Walkmaker Path

DIY - Building Paths with the Walkmaker

1. Prepare the project site by leveling the ground, removing sod or soil as needed. For a more durable base, excavate the area and add 2 to 4″ of compactible gravel. Grade and compact the gravel layer so it is level and flat.

2. Mix a batch of concrete for the first section, following the product directions (see page 33 to add color, as we have done here). Place the form at the start of your path and level it, if desired. Shovel the wet concrete into the form to fill each cavity. Consolidate and smooth the surface of the form using a concrete margin trowel.

DIY - Building Paths with the Walkmaker

3. Promptly remove the form, and then trowel the edges of the section to create the desired finish (it may help to wet the trowel in water). For a nonslip surface, broom the section or brush it with a stiff brush. Place the form against the finished section and repeat steps 2 and 3 to complete the next section. Forms can be rotated to vary pattern.

4. After removing each form, remember to trowel the edges of the section to create the desired finish. Repeat until the path is finished. If desired, rotate the form 90° with each section to vary the pattern. Dampcure the entire path for five to seven days

How to Create a Curved Walkway with Faux Mortar Joints
DIY - Building Paths with the Walkmaker

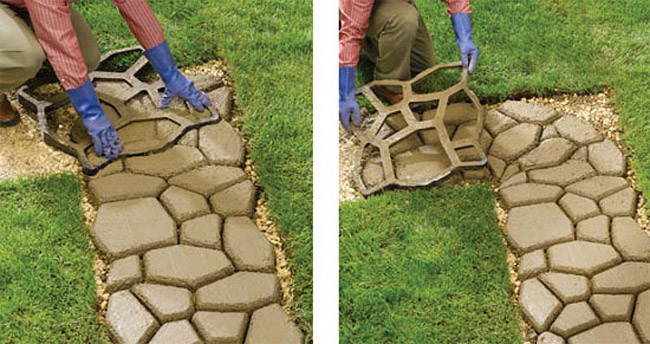
After removing the form from a freshly poured section, reposition the form in the direction of the curve and press down to slice off the inside corner of the section (photo left). Trowel the cut edge (and rest of the section) to finish. Pour the next section following the curve (photo right). Cut off as many sections as needed to complete the curve.
DIY - Building Paths with the Walkmaker

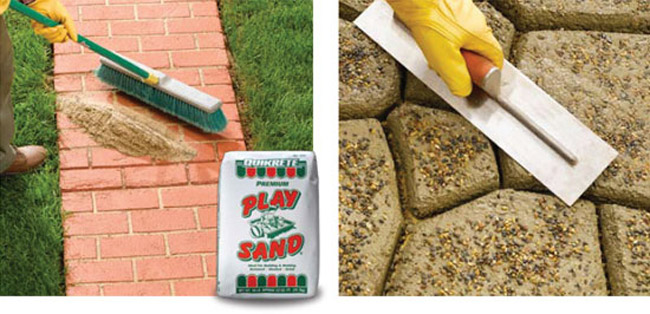
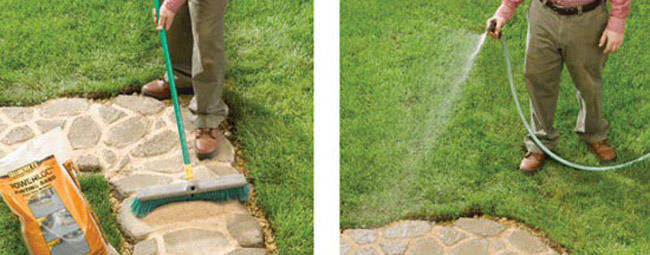
Sprinkle the area around the joint or joints between pavers with polymer-modified jointing sand after the concrete has cured sufficiently so that the sand does not adhere. Sweep the product into the gap to clean the paver surfaces while filling the gap.

Next, simply mist the jointing sand with clean water, taking care not to wash the sand out of the joint. Once the water dries, the polymers in the mixture will have hardened the sand to look like a mortar joint. Refresh as needed.

QUIK-TIP:

Use QUIKRETE PowerLoc jointing sand in place of play sand to simulate mortar joints. Sweep the polymer-modified sand into the joints, mist with water, and Powerloc will harden in place.

Coloring Your Concrete Path
DIY - Building Paths with the Walkmaker

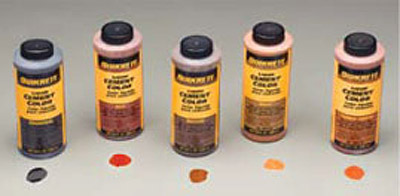
Coloring gives molded concrete a more natural looking finish and is great for blending your path or walkway into your landscape design. Adding colorant to the concrete mix is the easiest method and produces consistent results:

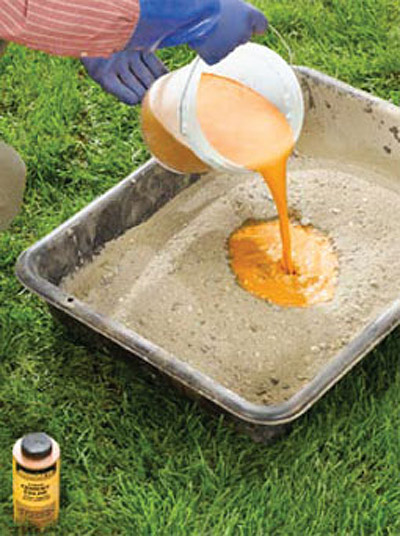
1. For every two 60-lb. or 80-lb. bags of dry concrete mix, first blend one 10 ounce bottle of QUIKRETE liquid cement color with 5 quarts of clean water. Mix the liquid into the dry concrete until the color is uniform. Add more clean water as needed to achieve the desired consistency.

2. After placing and finishing the path sections, cure the concrete carefully to produce the best color quality. If curing conditions will be less than ideal, apply QUIKRETE concrete sealer to ensure slow, even curing and good coloring.
DIY - Building Paths with the Walkmaker


Adding Decorative Effects

DIY - Building Paths with the Walkmaker

Fill walkway joints with sand or mortar mix to mimic the look of hand-laid stone or brick. Sweep the sand or dry mortar into the section contours and spaces between sections. For mortar, mist the joints with water so they harden in place.

Create custom surface finishes by pressing small stones or pea gravel into the wet concrete or by brushing on a layer of sand. Apply finish materials after the concrete has reached its initial set (thumb print hard) but is still damp—approximately one hour after placing.

Source: quikrete.com


Thanks for sharing this!
Bathroom Rug Tutorial
Bathroom Rug Tutorial 7 years ago
DIY - Build a Tree Bench
DIY – Build a Tree Bench 7 years ago
DIY Hanging Vertical Garden
DIY Hanging Vertical Garden 8 years ago
← Bergamot Essential Oil – Health Benefits and Uses
Dog Meat Is Finally Banned From Yulin Festival In China →

Leave a Reply Cancel reply

Your email address will not be published. Required fields are marked *

Recipe Rating


This site uses Akismet to reduce spam. Learn how your comment data is processed.

Quiet Corner

Tags

All About Home Architecture and Design Beauty Tips Cats cooking design diet DIY DIY Tutorial DIY Tutorials dogs Do It Yourself easy to make fitness food garden garden ideas Gardening Gardening Tips health Health and Beauty health tips healthy food Healthy Recipes home Home Interior Houseplants ideas Indoor Plants interesting Interesting Facts Interesting News Interesting Things Keto Keto Recipes meals Nutrition Ornamental Plants pet pets plant recipe recipes tips Yard and Backyard
WHO WE ARE

Quiet Corner is your place for relaxation! Quiet Corner will help keep you informed and it’s the definitive resource for weight loss, smart nutrition, health and beauty, home and gardening and all little things that make life happy, filled with tips, tricks and recipes to get you the body—and the life—you want…

LATEST COMMENTS
  • Great plans for the perfect greenhouse design my wife loves!!! I
    KEN KOPP
  • Thank you for sharing this very knowledgeable information.
    Diana
  • Beautiful
    Christina Mary Wolstenholme
POPULAR ARTICLES
  • How To Grow Banana Trees In Pots 431 people like this
  • Small Garden Design – Tips and Tricks 397 people like this
  • Keto Peanut Butter Blondie 370 people like this
  • Homemade Keto Chocolate Chips 333 people like this
OUR PAGES
  • About Us
  • Contact Us
  • Privacy Policy
  • Terms of Use
    This website uses cookies to improve your experience. We'll assume you're ok with this, but you can opt-out if you wish.Accept Read More
    Privacy & Cookies Policy

    Privacy Overview

    This website uses cookies to improve your experience while you navigate through the website. Out of these, the cookies that are categorized as necessary are stored on your browser as they are essential for the working of basic functionalities of the website. We also use third-party cookies that help us analyze and understand how you use this website. These cookies will be stored in your browser only with your consent. You also have the option to opt-out of these cookies. But opting out of some of these cookies may affect your browsing experience.
    Necessary
    Always Enabled

    Necessary cookies are absolutely essential for the website to function properly. This category only includes cookies that ensures basic functionalities and security features of the website. These cookies do not store any personal information.

    Non-necessary

    Any cookies that may not be particularly necessary for the website to function and is used specifically to collect user personal data via analytics, ads, other embedded contents are termed as non-necessary cookies. It is mandatory to procure user consent prior to running these cookies on your website.