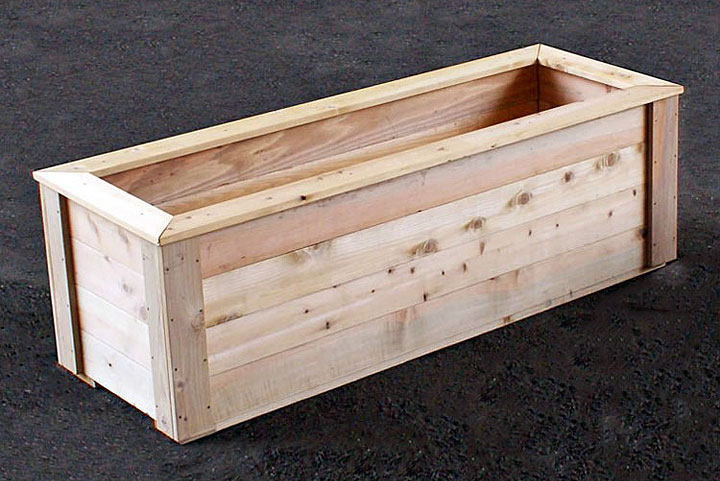
Cedar raised beds make gardening easier, more accessible, more economical, and more efficient. But often a cedar raised beds can cost hundreds of dollars. With this plan, I figured out how to create cedar raised beds – deep ones – for about $10 each.
Here’s those cedar raised beds I built for $10 bucks each . . . just before the moose ate the entire garden 🙁 I can’t rave enough about these beds, my garden was amazing and super low maintenance.
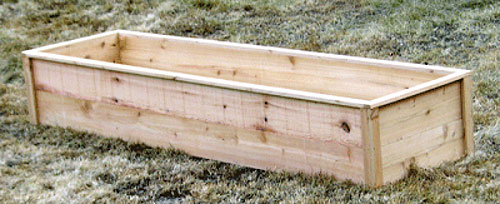

BUILD THESE. It’s a must build. A while back while shopping at the Blue Store – AKA Lowes – shopping for mortar and grout and stuff for our river rock stone veneer for the face of our house, I happened to smell some cedar. And I love the smell of cedar. So I followed my nose to a pile of dogeared 1x6s on special for $1.59 each.
$1.59 Each for a 1×6, 6′ Long. That’s 1/3 the cost of pine 1x6s. And granted, these were fence pickets and the corners were tapered off, but that’s only the top inch.

And yes, the were 5/8″ thick instead of 6/8″ (or 3/4″), but I was okay with not paying 10 times as much to get my corners back and an 1/8″ of thickness. Besides, I had a specific use in mind for these fence pickets.

So I bought six boards for a grand total of $9.54, and went home and somehow found 20 minutes to build this. Not bad for $10. And naturally weather resistant cedar too! For a planter, you want to use natural wood because treated lumber releases odors and chemical that you don’t want mixed in with your food. And cedar naturally resists rot and insects, so a great choice for planters.
Shopping List:
- 6 Cedar Fence Pickets
- 1″ Screws
- 2″ Screws
- Wood Glue
- Finishing Supplies
Tools:
- Tape measure
- Speed Square
- Pencil
- Safety Glasses
- Ear Protection
- Drill
- Circular Saw
- Table Saw
General Instructions: Work on a clean level surface and check for square after each step. Predrill and countersink your screw holes. Be safe, especially with the table saw, and have fun.
Dimensions:
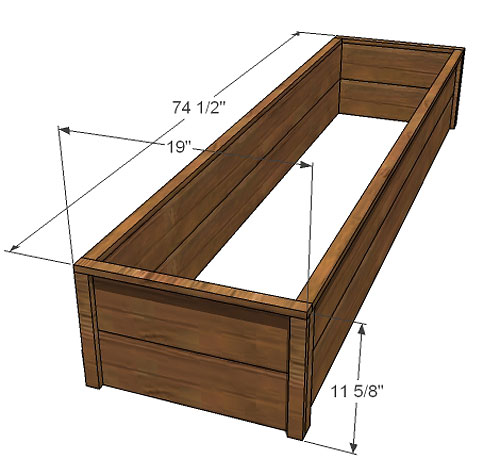
Dimensions are shown above.
Cut List:
- 4 – 1×6 Fence Pickets @ 72″ (Side Panels, you can trim the dog ear off and work with a 71″ Fence post)
- 8 – 1×2 Fence Pickets @ 11″ (Corner Posts)
- 4 – 1×6 Fence Pickets @ 17 3/4″ (End Panels)
- 2 – 1×2 Fence Pickets @ 72″ (Top Trim, I used the non-dogeared ones from the center of the cuts)
- 2 – 1×2 Fence Pickets @ 19″ (Top Trim, Ends)
Step 1:
Rip your Corner Posts In 160 Plan Posts, I’ve never asked you to rip anything. And I’m dreading asking you to rip this fence post. But I’ve done the math, and by ripping one fence post into 4 – 1 1/4″ wide strips, you are saving quite a bit of money (well, that is, if you intend to build a garden full of planters). So set your table saw to 1 1/4″ and rip one of the fence posts to 1 1/4″ wide, as shown above. If you don’t have a table saw, you can use 1×2 cedar boards, but you will need to add 1/2″ to the final top trim boards on the ends. And you are going to have to shell out an extra few bucks.

Step 2:
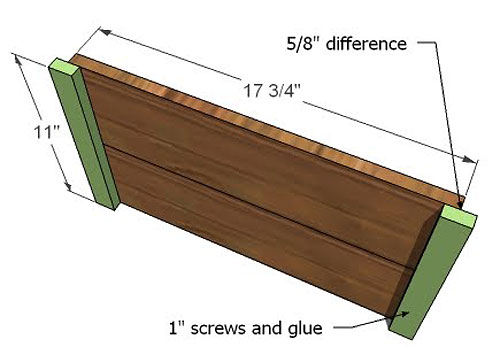
Instructions: Side Panels Use your 1″ screws and glue to put together your side panels as shown above. The post will overextend the sides by 5/8″ as shown above. I also used my Kreg Jig™ to join the boards together in the center, and you can do this too. But I feel like my planters are too “flat” and had I not joined the boards in the center, the planter would be more rustic.
Step 3:
Instructions: End Panels Build your end panels exactly like your side panels.
Step 4:
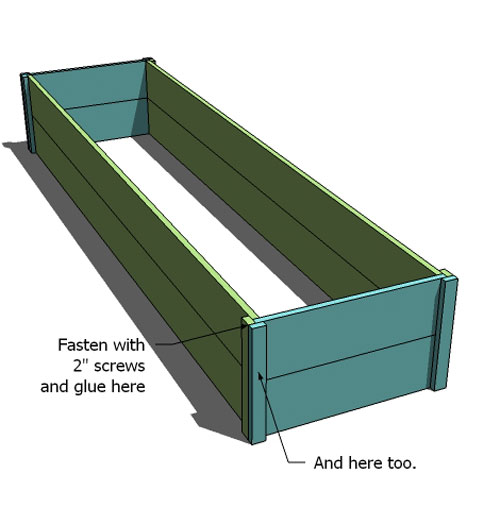
Instructions: Assembling the Panels The panels should fit together like a puzzle. Fasten with 2″ screws and glue. Check for square.
Step 5:
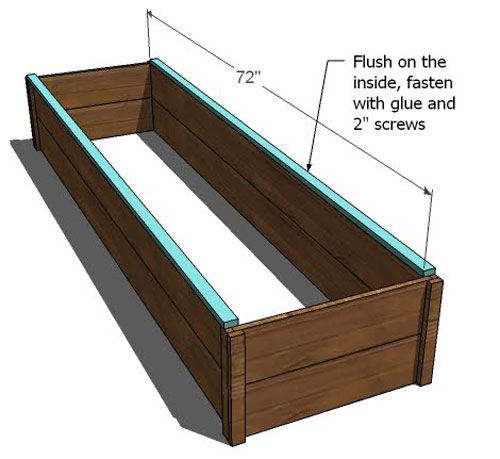
Instructions: End Top Edges Finish the end top edges just like you did the sides. If you used 1x2s measuring 1 1/2″ wide, you will need to measure and cut this board to the planters dimensions.
I haven’t found the time to finish the planter (and may choose to leave them natural) but I wanted to share this project with you right away. Of course, you can build a different size, lower sides, or even planters with enclosed bottoms. And I also thought that these boards would make great siding boards for our playhouse.


Leave a Reply