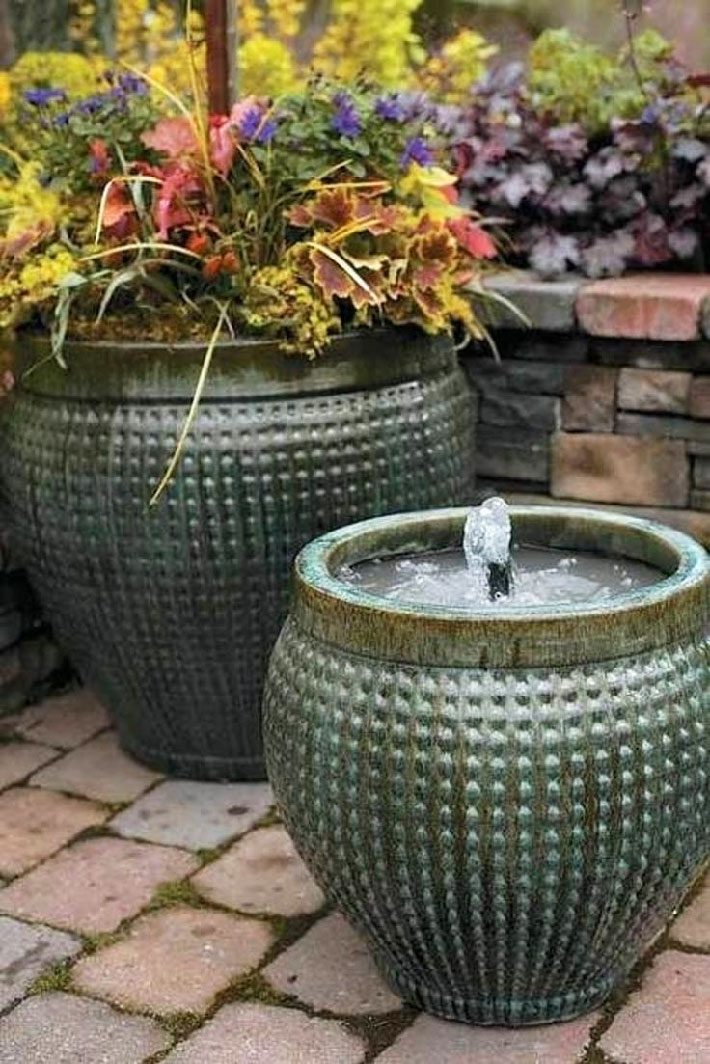
With just a little work, a beautiful pot and a few other materials, you can create an inviting space in your garden that will soothe jangled nerves and give the birds a pretty drinking spot.
A water feature does all that. It can be as simple as a flat-bottomed bowl for a birdbath or as dramatic as an elaborate waterfall. Or you can do as we did and turn one gorgeous container into a bubbling fountain suitable for a flower bed, deck or just about any place in your garden.
It only takes a couple of hours, and you may already have most of the materials. Mulysa Melco and Jason Pedersen at Dennis’ Seven Dees in Southeast Portland put one together for us for about $200, but do it yourself and use what you have and it could cost far less. Here’s how:
Materials to Make a Fountain in a Pot
- Pot
- Pump
- 1/2-inch pipe (PVC, copper or clear plastic)
- Black spray paint (optional)
- DAP 100% Silicone Rubber Sealant
- River rock
- Plastic nursery pot
- Electrical tape
- Duct tape
- Rubber gloves
- Pruning clippers
- Utility knife
- Shims or pot feet

1. Choose your pot and the area where it will be displayed — you’ll need an electrical outlet nearby. Any pot that will hold water — even an inexpensive plastic pot, but not terra cotta — will work. Melco chose a frost-proof stoneware pot ($53). Its lip curves inward slightly, which makes the water’s splash echo. If you want to paint the inside of the pot, she suggests black or the same color as the outside of the pot.
2. Check the chart on the packaging to make sure your pump is the sufficient size for your pot and how high you want the water to go. Pedersen’s choice ($49.99) comes with adapters and pumps 190 gallons per hour.
3. Connect the pipe to the pump. Use an adapter, if necessary, so that it fits snugly. PVC pipe can be painted black to make it look better. Copper pipe combines beautifully with many pots. And Melco suggests clear plastic pipe, available at craft stores, for a more contemporary look. Attach the pipe to the pump, place it as it will be in the bottom of the pot and decide how high you want the pipe. Mark the pipe, remove it from the pump and cut it to the correct length.

4. Thread the pump’s cord through the bottom of the pot.
If the hole isn’t large enough to accommodate the plug, cut the cord a couple of inches from the plug. Pull the cord through the hole and reattach the plug by splicing the like-colored wires together.
Wrap the spliced wires in electrical tape, making sure that there are no exposed wires and that no water can get to the wires.

5. Use duct tape to hold the pump out of the way on the inside of the pot, leaving a small amount of slack cord. Tape the cord in place outside the pot.
Pedersen recommends wearing rubber gloves as you apply a generous amount of the silicone sealant on the inside of the pot and then on the outside. Don’t allow the cord to move, as that would break the silicone’s seal. Check the silicone’s label for drying time.

6. Select a used nursery container that will fit inside the pot and cover the entire pump. Turn it upside down and cut an opening large enough for the pipe. Put the pipe through the hole, connect the pipe again to the pump and cover the pump with the nursery container. (The container holds the pump in place and keeps rocks and other debris from getting into the pump.)
7. Plug in the pump, add water and test. Adjust the pump as necessary to get water to pump to the appropriate height.
8. Add river rock. You may need to use some fill (larger rocks, for example) beneath the river rock to get it to the desired height.
9. Tuck shims or pot feet under the pot so that it doesn’t wobble, put the cord out of sight and add water as you like to the pot.
10. Enjoy.


Do you put the river rock inside the pot? If so, do you do that before or after adding the water?
Yes, add the rocks to desired height before water.
How high should you fill the pot with the water.
Where did you get the pot?