
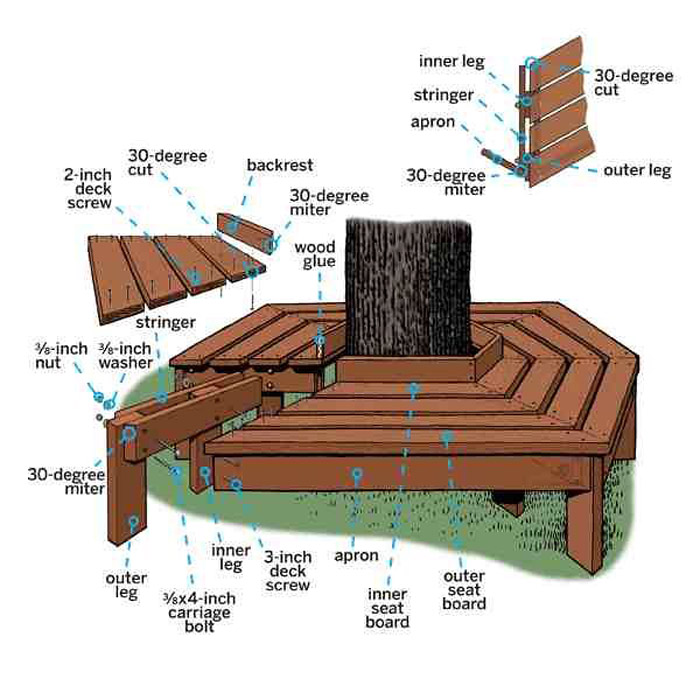
This comfy, stay-cool tree bench has room for the entire family. To build it, Mark Powers chose a specially impregnated and thermally modified pine that’s as hard and dense as an exotic hardwood, and resists decay and termites, too. (You’ll have to drill pilot holes for every screw to be driven through it.) Put your tree bench together, and you’ll enjoy lounging on it with a favorite book all summer long.
TOOLS
- Compound miter saw or circular saw drill
- Drill/driver with a 3⁄8-inch spade bit and 3⁄32×3-inch bit speed
- Speed Square
- Clamps
- Adjustable wrench
- 4-foot level
- Garden spade
- 120-grit sandpaper
MATERIALS
- strips of scrap lumber or cardboard to make a template and spacers
- ¼-inch-thick scrap lumber or shims
- 5⁄4×6 decking by Kebony for the seat and stringers for the leg assemblies. Measure your tree so that you know how much to buy.
- 2×6 framing by Kebony for the backrest, legs, and apron 3⁄8×4-inch galvanized carriage bolts
- 3⁄8-inch galvanized locking washers
- 3⁄8-inch nuts
- 2-inch stainless-steel deck screws
- 3-inch stainless-steel deck screws
- wood glue
Project timeline
Friday: Make the bench’s template and size the sections.
Saturday: Cut and lay out the seat boards, and make the leg assemblies.
Sunday: Attach the seat boards to the leg assemblies, install the bench around the tree, and add the backrest and apron.
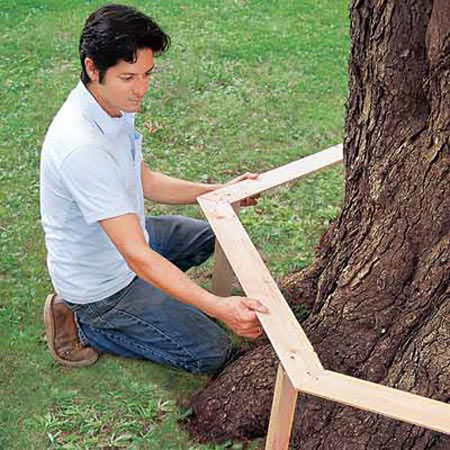
Step 1: Create a Template
You’ll make the bench from six sections of equal size. Measure the tree’s diameter in inches at the seat’s height (16 to 18 inches). Add 6 inches for a mature tree; add 12 inches for a young tree, to allow for growth. Divide the total by 1.75 to find the length of the short sides of the inner seat boards. Mark this length on a strip of scrap lumber or cardboard, and cut the ends at opposing 30-degree angles so that the opposite side is longer. Cut five more template pieces to size. Check for fit by joining the pieces around the tree using clamps or scrap lumber, and adjust as needed.
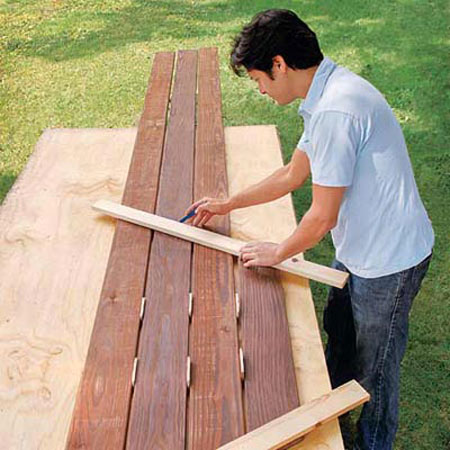
Step 2: Size the Seat Boards
Use a piece of the template to cut an inner seat board to size from 5⁄4×6 decking. Lay three boards parallel to it, separated by ¼-inch spacers, as shown. Lay two pieces of scrap lumber atop the boards, following the angled cuts on the inner seat board, and trace cut lines onto the uncut boards.
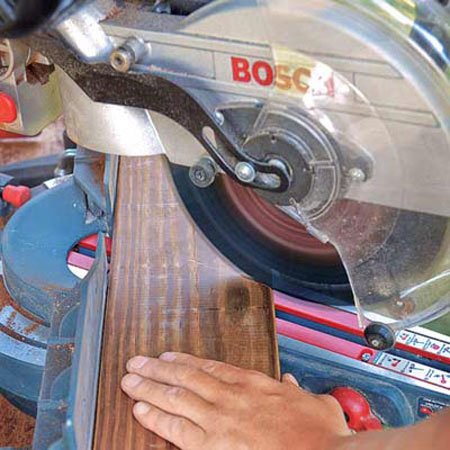
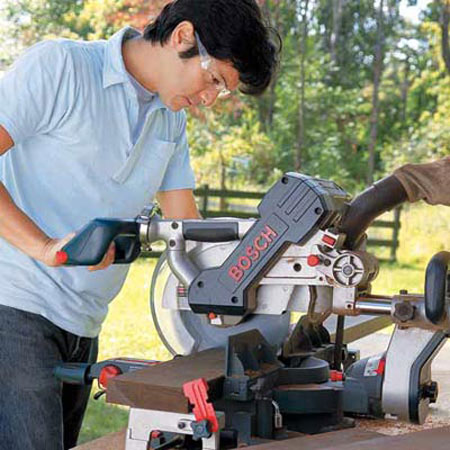
Step 3: Cut the Boards to Size
Set the miter saw to 30 degrees. Cut the three seat boards you marked in the last step to length with opposing angles on either end. Using each of the four seat boards as a guide, measure and cut five more boards at each size to make all the seat boards for the bench’s six sections.
Tip: When you’re cutting many equal-size pieces, use a stop block with your saw to size the cuts, and try swapping them around in layout to find the best fit before resorting to sanding joints or cutting new pieces.
Step 4: Lay Out and Adjust the Boards
Arrange the seat boards in a hexagonal shape on a flat surface using ¼-inch spacers between them, as shown. Starting with the inner seat boards, align and adjust the joints between them. Then adjust successive rings of boards until the joints are aligned and the pieces fit together.
Step 5: Cut the Pieces
The leg assemblies consist of outer and inner legs sandwiched between two stringers. Cut 12 legs from 2×6 framing to the height of the bench, minus the thickness of the seat boards. (If the ground around the tree is uneven, make the legs longer so that you can level the bench later by digging out soil beneath them.) Measure the distance from the midpoint of an inner seat board at its cut end to the long point of the outer seat board. Subtract 3 inches to leave room for a reveal and an apron. Cut 12 stringers from decking to this length. Cut a 30-degree miter off the front end of each stringer, where the apron will be attached, as shown in the illustration.
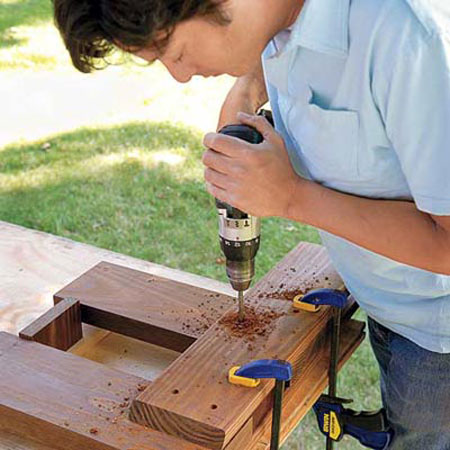
Step 6: Mark and Drill Bolt Holes
Using a Speed Square, measure 2 inches from the front edge of an outer leg, and make a vertical mark on the flat side of the leg at this spot. Repeat for the other side of the leg. Sandwich the leg between two stringers so that the pieces are flush at the top, with the long ends flat against the leg and lined up with the marks you made. Slip the inner leg between the stringers, and use a spacer to keep it parallel to and at least a few inches from the outer leg. (Don’t move the inner leg too far back; you don’t want it to rest on any tree roots.) Clamp the pieces to a work surface on top of a scrap block of wood. Drill two vertically aligned 3⁄8-inch holes through the stringers and outer leg, as shown. Then drill two staggered, diagonally offset holes through the stringers and inner leg.
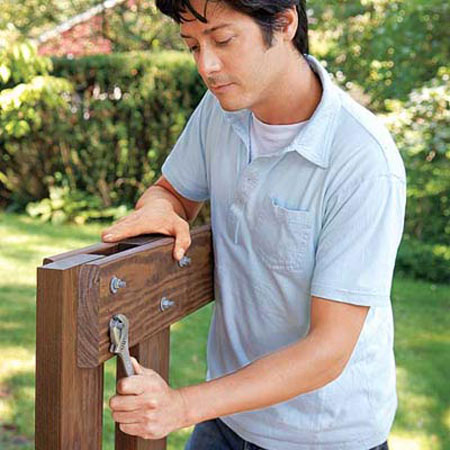
Step 7: Bolt the Leg Assemblies Together
Slip a 3⁄8×4-inch carriage bolt through each hole you made in the last step. Use an adjustable wrench to secure each bolt with a washer and nut. Repeat these steps for the remaining five leg assemblies.
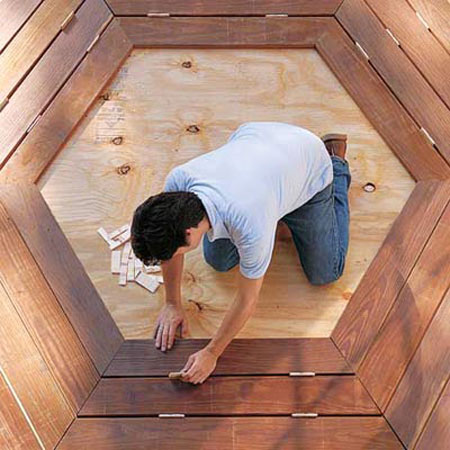
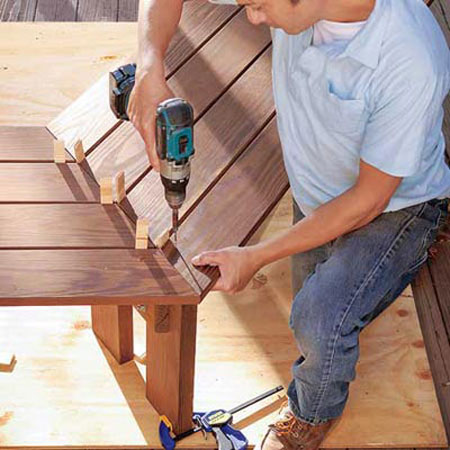
Step 8: Begin Assembling the Sections
Stand the leg assemblies in position on a flat surface, using clamps to keep them from tipping over. Lay the seat boards, with ¼-inch spacers between them, on top of the leg assemblies. The joints between the boards should be centered over the legs. Adjust the boards so that the front edge of the bench creates a ½-inch reveal beyond each leg assembly. Next, create two sets of two joined sections. Attach the outer three seat boards of two adjacent sections to the three leg assemblies they rest on (two at the ends and one in the middle) by drilling 3⁄32-inch pilot holes through the boards and into the stringers, then driving 2-inch deck screws into the pilot holes. Do the same for the two adjacent sections that are opposite the ones you just fastened together. Remove and set aside any loose seat boards.
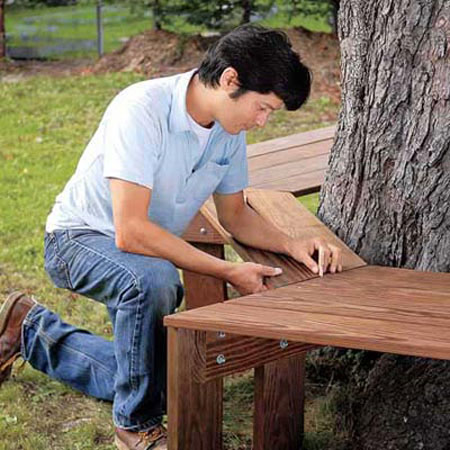
Step 9: Attach the Remaining Sections
Place the two sets of joined sections on opposite sides of the tree. Place the remaining seat boards between them, on top of the exposed halves of the leg assemblies. Adjust the joints, and fasten the outer three seat boards to the stringers, as described in the last step.
Step 10: Level the Bench
Place a level on the seat of the assembled bench. Use a garden spade to remove soil beneath the legs until the seat is flat.

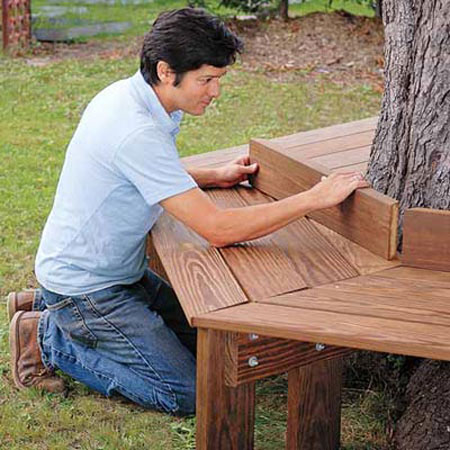
Step 11: Cut and Install the Backrest
Set the edge of a framing board flush with the back edge of an inner seat board. Scribe the angles of the cut ends of the seat board onto the backrest’s bottom edge, and bevel the ends of the backrest following the 30-degree cut lines you marked. Glue the backrest to the back edge of the seat board. Lift the pieces from the bench and clamp them together. Drill 3⁄32-inch pilot holes through the underside of the seat board and into the backrest.
Drive 3-inch deck screws through the holes. Set the assembly in place; repeat for the adjacent seat board and backrest. Glue together the mitered edges of adjacent backrests, and drill 3⁄32-inch pilot holes diagonally through the joint at the top and bottom. Drive a 2-inch deck screw through each hole. Repeat until the entire backrest is fastened together. Then screw the inner seat boards to the stringers, as described in the 9th step.
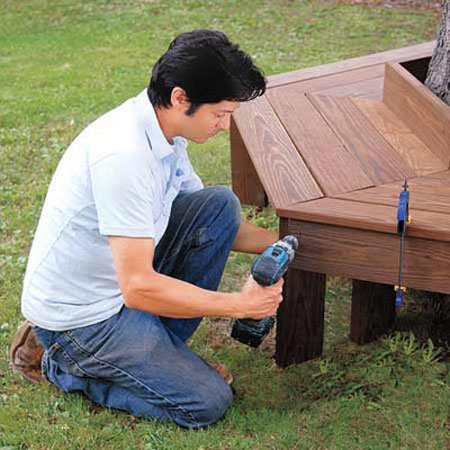
Step 12: Cut and Install the Apron
Measure the distance between the long points of the stringers for each section. Cut six boards from framing to this length, beveling the ends with 30-degree miters. Hold one board in place by clamping it beneath an outer seat board. Drill pilot holes and attach it to the outer legs with 3-inch deck screws, as described for the backrest in the last step. Drive a few evenly spaced screws through the length of the outer seat board and into the top edge of the apron. Repeat for the remaining apron boards. Finish the tree bench by sanding any rough spots.
Source: thisoldhouse.com
Photos: Matthew Benson

Wonderful Wood Pallet Outdoor Furniture Ideas
7 years ago

DIY Homemade Sea Salt Soap
8 years ago
DIY – Outdoor Garden Box
9 years ago
Leave a Reply