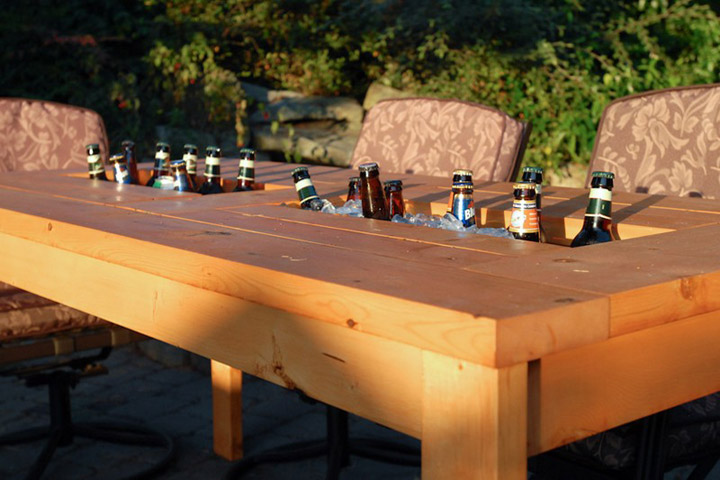
Create your own patio table this summer with two center built-in beer or wine coolers as created by Domesticated Engineer.
Materials: DIY Patio Table
Materials:
- Wood glue
- Wood filler
- Wood screws
- Two plastic planter boxes
- Kreg jig
- Square
- Clamps
- Pencil
- Circular saw or miter saw
- Wood conditioner
- Wood stain
- Sandpaper
- Sponge Paintbrush
- 2 – 6′ x 2′
- 3 – 8′ x 2′
- 8 – 1′ x 6′
- 16 – 2′ x 4′
- 14 – 1′ x 4′
- 10 – 1′ x 2′
Instructions: DIY Patio Table
Instructions:
1. Using a saw cut your wood boards to the following measurements:
- 2 – 6′ x 2′ to 5′ 9 1/4″ (for the top long boards)
- 3 – 8′ x 2′ to 1′ 9″ (top side and middle boards)
- 12 – 2′ x 4′ to 1′ 11 3/4″ (top center boards)
- 4 – 2′ x 4′ to 2′ 5 1/4″ (table legs)
- 2 – 1′ x 4′ to 5′ 2 1/4″ (outer long skirt under the table)
- 2 – 1′ x 4′ to 5′ 6 1/4″ (inside long skirt under the table)
- 2 – 1′ x 4′ to 2′ 5″ (short skirt)
- 4 – 1′ x 4′ to 2′ 3 1/2″ (cross beam)
- 4 – 1′ x 4′ to 2′ 1 1/4″ (box supports)
- 4 – 1′ x 6′ to 1′ 11 3/4″ (long planter box box side frame)
- 4 – 1′ x 6′ to 8′ 3/4″ (short planter box side frame)
- 10 – 1′ x 2′ to 7′ 1/4″ (bottom support for planter box frame)
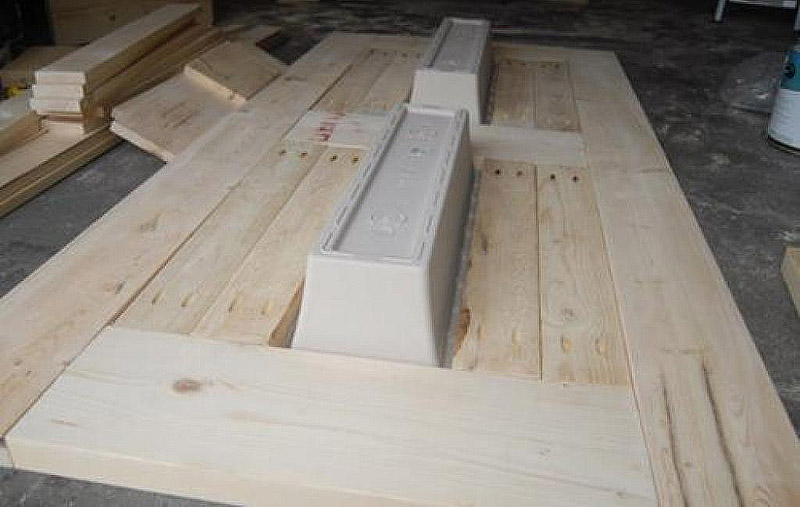
2. Lay down all the pieces for the top of the table, with two top long boards, two side boards for the short sides of the table and another piece in the middle. Finally place the four center boards and the planter boxes in the middle of the table top.
3. Using the Kreg Jig put 4 pocket holes at the ends of the four center boards. Next place two pocket holes next to each other to connect the top long boards to the top side and middle board.
In the end both of the top long boards should have 6 holes, two near the top, two in the middle and two at the bottom.
3. Use wood glue on all the board edges then using 2 1/2″ wood screw attach the boards using the pocket holes.
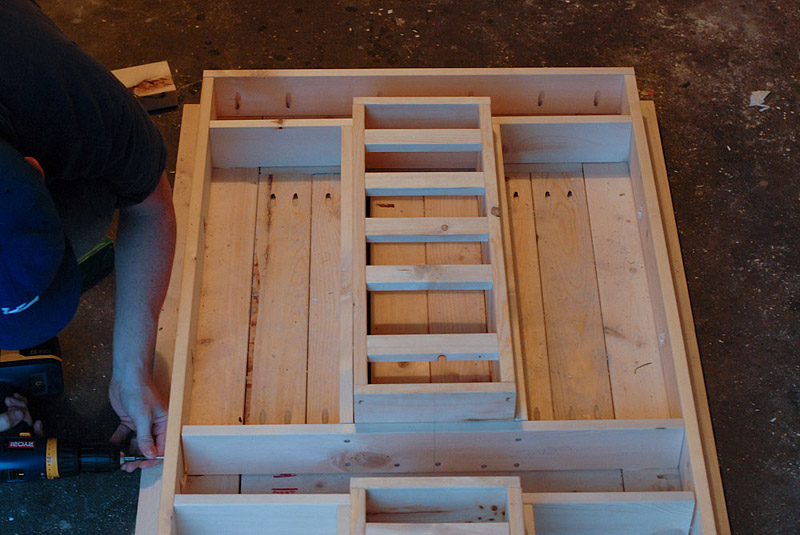
4. Using 1 1/4″ wood screws, screw together the two planter box frames. At the bottom of the wooden rectangle frames screw in five short supports that go across the bottom of the frame to prevent the plastic planter box from falling out.
5. Attach the two 2′ 1/4″ box supports to the sides of the planter box frames by using wood glue and 1 1/4″ wood screws.
6. Using wood glue on the edges and 1 1/4″ wood screws attach the inside long skirt pieces to the top of the planter box frame, and screw into the box supports.

7. Complete framing the base of the table by assembling the outer skirt and cross support beams using 1 1/4″ wood screws and wood glue.
8. Position the table legs to go to the four corners of the table top. Attach the table legs to the outer skirt using 1 1/4″ wood screws.
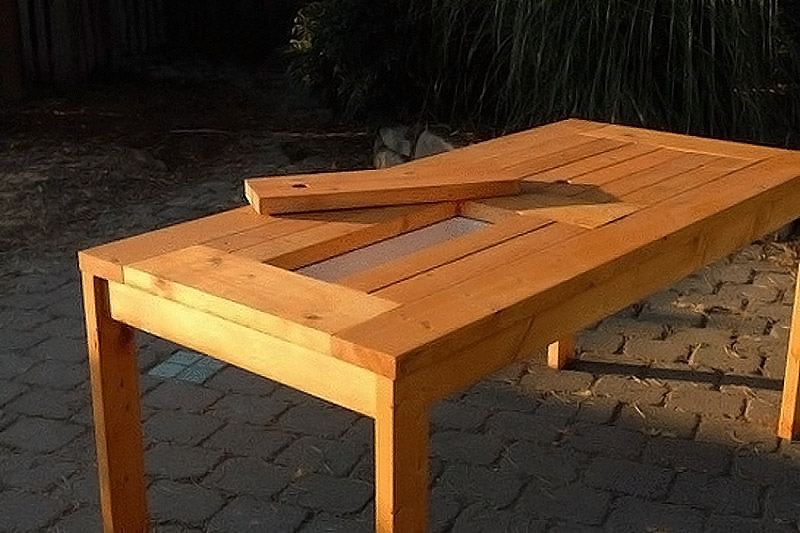
9. Sand the table, and condition wood with wood conditioner.
10. Stain the table using a foam paintbrush and your choice of stain.
For further information about this project visit Domesticated Engineer.



Leave a Reply