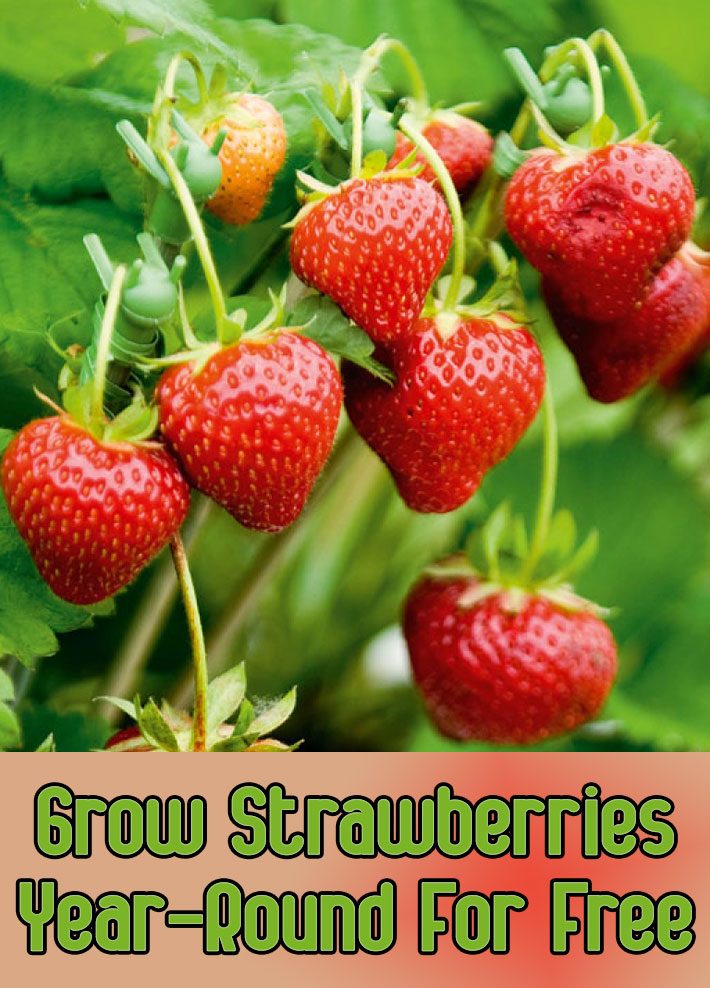
Strawberries are one of the most delicious summer foods. There are few things as satisfying as biting into a juicy, red strawberry and savoring its unique combination of sweet and tart flavors.
Instructables user lsadwdwadw recently shared their brilliant method of growing strawberries indoors. All you need are a few materials that are likely lying around your house already, some sunlight, water and a little bit of elbow grease.
Ready to become a strawberry farmer? Keep reading for an easy tutorial!
What You’ll Need To Grow Strawberries Year-Round For Free
- Cardboard toilet paper rolls
- One fresh strawberry (from the garden, a shop, or from the wild)
- A toothpick or similar “picking” object
- Scissors or a knife
- A container for carrying seedlings around
- Soil
- Transparent plastic bag or sheet of plastic
- A digging implement (spoon, trowel, hands, etc)
STEP 1: EXTRACT STRAWBERRY SEEDS
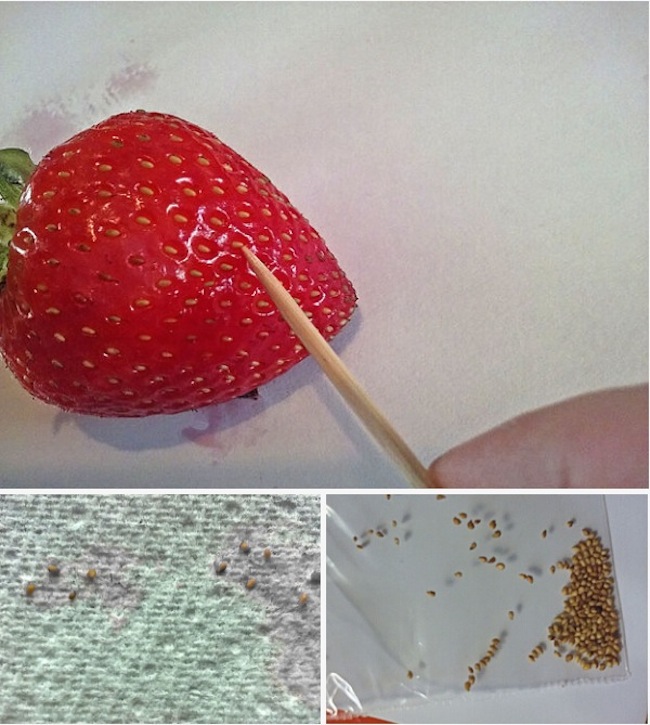
Why spend money on strawberry seeds or seedlings when they come included with the fruit you love? Using a toothpick or knife point, scrape at the seeds to dislodge them and remove them from the fruit.
“It is okay if a bit of the fruit’s flesh comes with the seed. I placed them on a piece of paper towel to help dry them out,” the author explains.
2. CREATE SEEDLING POTS
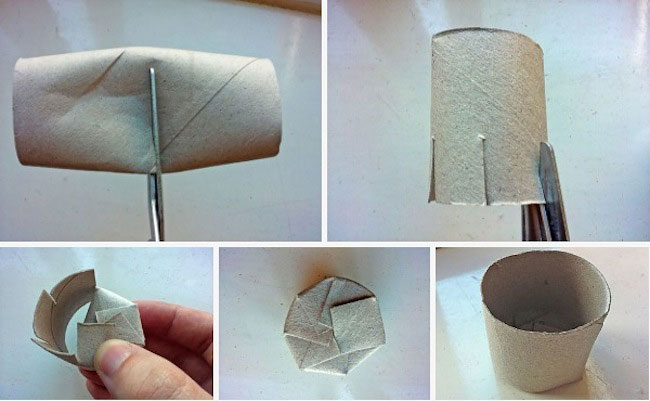
Once your seeds are safely extracted, it’s time to build a place for them to germinate. Rummage in your recycling bin for some clean, dry, cardboard tubes that are leftover from toilet paper or paper towels.
Cut the toilet paper roll in half using a scissor or knife. Then cut 1/2 inch long slits all along one edge of the roll. Fold each segment so that each one overlaps the previous segment, forming a small container that will hold dirt.
3. ADD SOIL
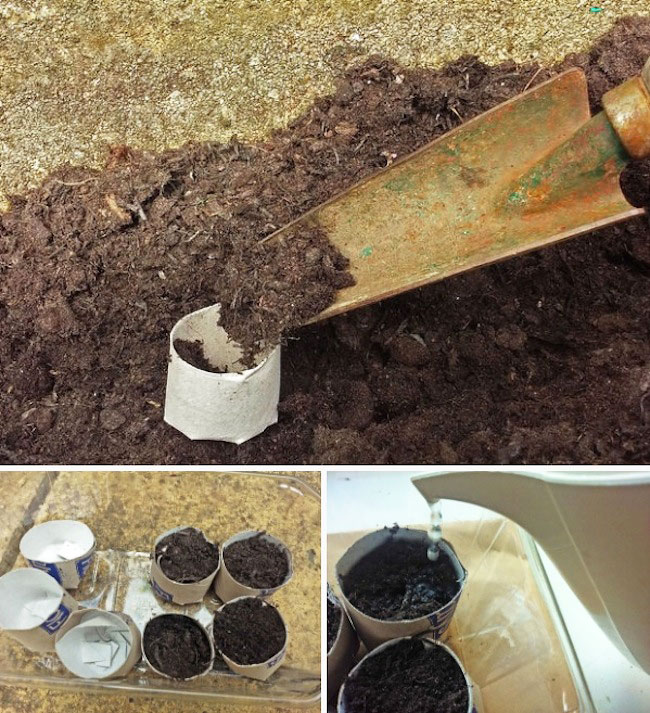
Loosely fill each seedling pot with soil.
“Once all the pots are filled, pour a little water in each pot, just so that the soil is wet, but not absolutely flooded with water. The soil will compact slightly as you water it,” explains the author.
STEP 4: GERMINATE YOUR SEEDS
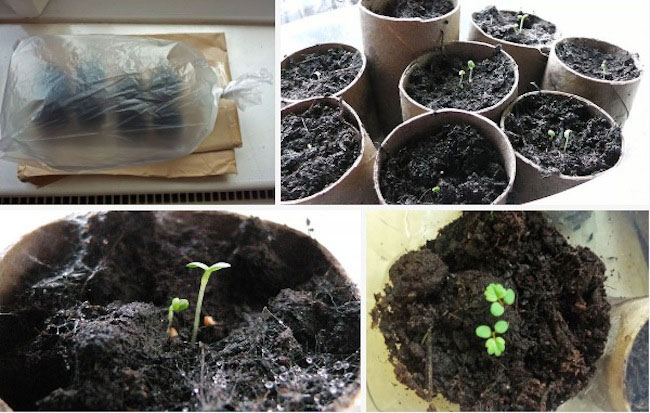
Drop one or two strawberry seeds into each germination pot. Don’t cover them with soil, just leave them where they fall. Place the seedling pots inside a small plastic container so that it’s easier to transport them, and place the entire container inside a see-through plastic bag or cover with a clear plastic dome. This helps keep the atmosphere around the seeds warm and humid while also allowing light to reach the soil.
Position your seedling pots in a place where they’ll get lots of sun, like a window sill. Water the pots lightly if soil gets dry to the touch.
“Varying greatly depending on the seed condition, variety, season and ambient temperature etc, your seeds will hopefully germinate and create small visible seedlings in around 2 to 3 weeks. The seeds that I sowed that are pictured actually created small visible seedlings in 11 days (UK, summertime),” explains the author.
STEP 5: TRANSPLANT AND/OR HARVEST
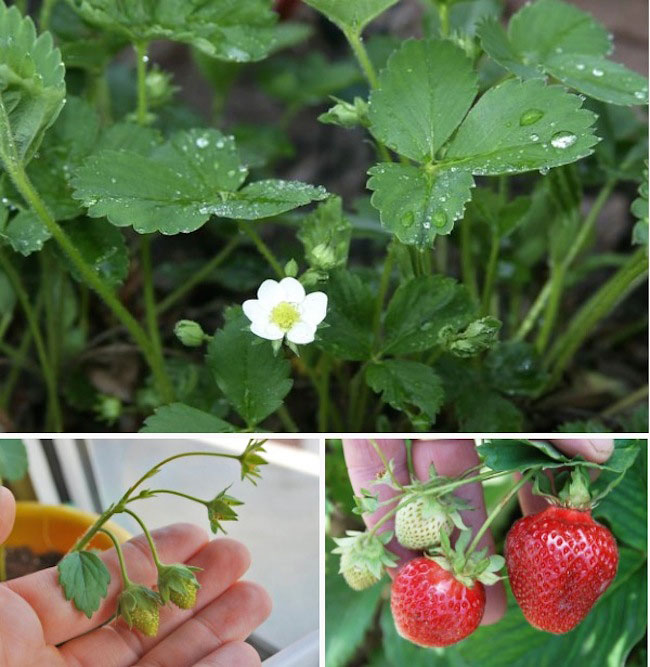
At some point, it’s best to transplant your strawberry seedlings into a bigger container where they can continue to grow all year round. You can plant the seedlings with their biodegradable toilet paper roll pots directly into a bigger pot, but be sure to carefully pull the pot apart slightly so it’s easy for roots to escape.
“When growing strawberries from seeds, the plant usually creates a crop of strawberries the following year. First the flowers will be produced, which then finally turn into strawberries. Patience is key!” explains the author. “A big tip is to pinch off the flowers (that eventually become strawberries) in the first year—this will allow the plant to become stronger and result in a significantly increased crop of strawberries in the following year.”



Leave a Reply