
Snowflake Sugar Cookies with Royal Icing
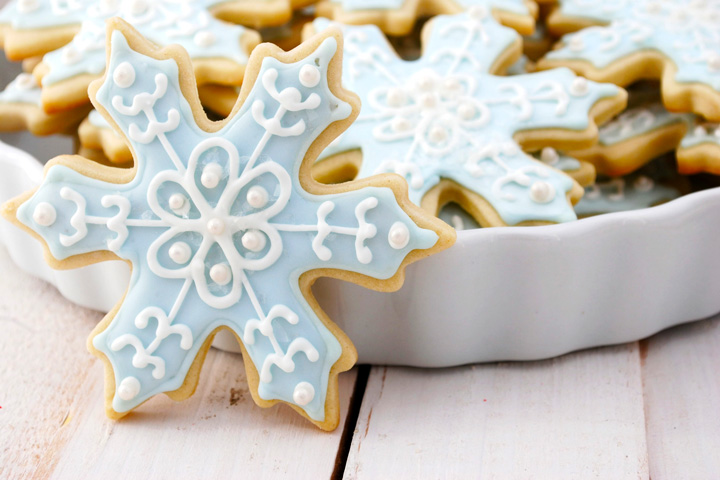
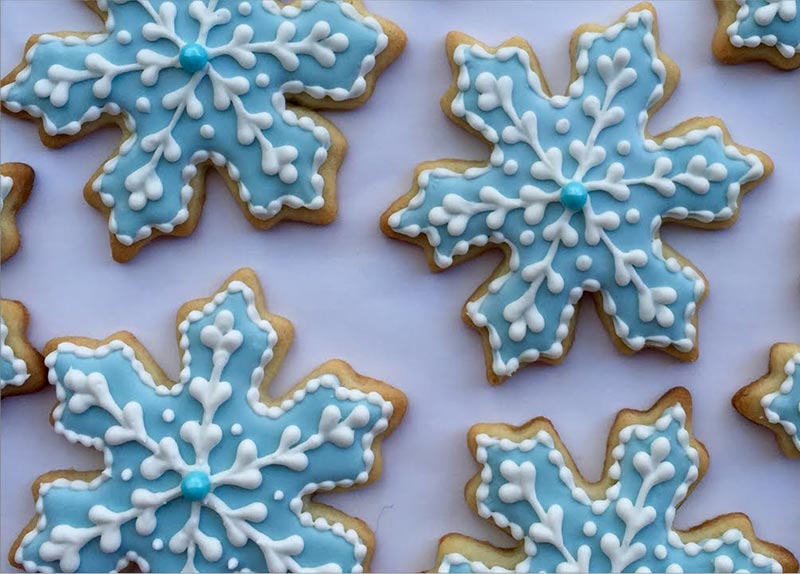
Perfectly decorated snowflake sugar cookies with royal icing are not just for cookbooks and magazines. You can make them at home to give your friends and family a tasty and decorative treat for the holidays.
I’m not going to lie to you – they did take a long time. Here are the basic steps:
1) make sugar cookies – it took me about 4 batches of 6 cookies to use all the dough
2) outline the cookies in light blue royal icing (tip #2)
3) flood cookies with light blue royal icing
4) detail with white royal icing
5) add white sugar pearls and clear cake sparkles
You can make the cookies over two days or all in one day if you start early enough. You can outline and flood back-to-back (within 15 minutes or so) but you need to let the flooded part of the cookie set for several hours before you go back and pipe the detail. With a few practice cookies you should get the hang of how the piping works. Keep a steady hand and practice your best patience.
Good luck! 🙂
Ingredients:
For the cookies:
- 1 cup butter, softened
- 1 cup powdered sugar
- 1 egg, beaten
- 1 tsp almond extract
- 1 tsp vanilla
- 1 tsp salt
- 2 1/2 cups flour
In a large mixing bowl, beat butter until soft and creamy. Slowly add powdered sugar and beat until well combined. Add in egg, almond extract, vanilla, salt and flour and continue to mix until smooth. Chill dough until firm, at least 1 hour.
Preheat oven to 375F. Line two cookie sheets with parchment paper and set aside.
Roll out dough on a well floured surface until it is 1/4 inch thick. Cut out cookies with floured cookie cutters and carefully transfer them to the prepared cookie sheets. Bake cookies for 6-9 minutes. Cookies should NOT brown – with the snowflake tips it’s easy to overbake them so be extra cautious. Let cool completely on cooling racks before frosting.
For the icing:
- 2 Tbs meringue powder (found at any craft/baking store)
- 4 cups powdered sugar
- 6 Tbs water
- blue liquid food coloring
Place all ingredients in the bowl of a stand mixer. Using the paddle attachment, beat frosting on low until matte and smooth, about 7-8 minutes.
Remove icing and divide into two separate, covered containers: 2/3 of the icing in one container and 1/3 in the other. To the first container (2/3 of the icing) add about 3 drops of blue food coloring, or until it is your preferred shade of blue. Stir well and cover both containers.
Starting with the blue container, dilute frosting with water so it is a pipeable consistency, but be careful and only add a tiny bit of water at a time because it dilutes rather easily. When the icing is at the right consistency for piping and place it in a piping bag fit with a small, round tip. I used a #2 tip for outlining these cookies. Pipe thin, smooth outlines on each of the cookie and set aside.
Once all of the outlines are piped, add the remaining blue frosting back to the blue container and dilute it to a “flooding” consistency. Make it thin enough that it is easy enough to spread within your outline. Using a spoon, flood each cookie. You can use a toothpick to help guide the flooding into tough corners. When you finish, cover the blue frosting and let cookies dry for at least 3 hours.
Dilute the the white icing to a pipeable consistency like the you did for the blue outline. When the icing is at the right consistency for piping, place it in a piping bag fit with a small, round tip. I used a #2 tip for the detailing. Detail your cookies as desired, but make sure to move quickly because the frosting does dry quickly. Add pearls and sparkles. Repeat steps with each cookie and let them harden overnight before placing them in an airtight container the next day.




Leave a Reply