
DIY Tutorial Kitty Corner Cat Play House
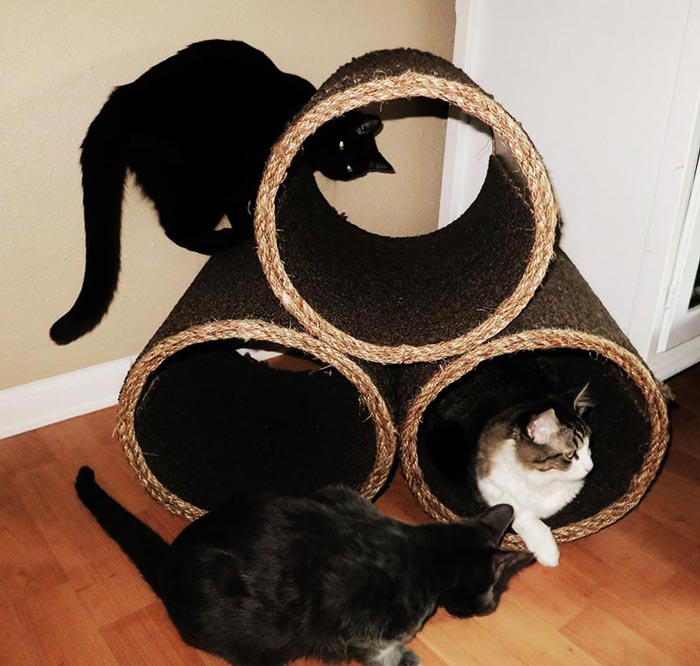
You can build the purrfect kitty corner cat play house
Tools and Materials:
Tools:
- Drywall square or tape measure
- Handsaw
- Carpet knife
- Clamps
- Caulk gun
- Tape
Materials:
- 1 12-inch concrete form tube
- 1 Liquid Nails adhesive
- 2 ft. 5/8-inch rope
- 12 ft. carpet runner
Instructions:
A concrete form tube and a modest budget translate into a heavenly home for your feline friends. Carpeting wrapped around the form exteriors is ideal for claw sharpening. Loose carpet pieces inside are easy to change out and create cozy chambers for napping. For extra fun, a piece of weighted rope for batting around offers a playtime diversion.
Step 1
There may be slight variances between actual lengths of tubes. It is best to measure yours and divide by three to get your individual tube length. Ours came out to 16 inches.
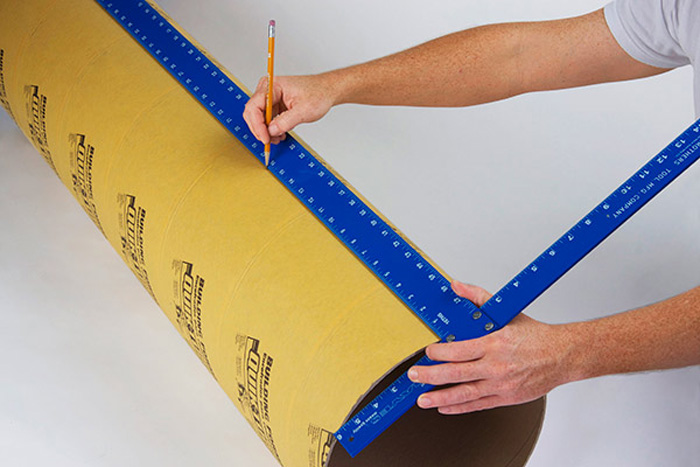
First, draw cutting guides on the tube — this allowed us to cut three 16-inch segments. Measuring 16 inches down the tube, make a pencil mark. To make sure marks are equal all the way around the tube, use a drywall square. As shown in the image, position the square so the small top arm rests on the top of the tube. This will keep the long arm of the square perpendicular to the top edge of the tube. Rotate the tube around approximately 6 inches and make another mark. Continue until you have made it all the way around the tube. Repeat this process, measuring from the opposite end of the tube so that you have segmented the tube into three equal portions.
If you don’t have a drywall square, use a tape measure. Just make sure you are holding the tape measure as straight down the tube as possible so that all your marks are even for step 2.
Step 2
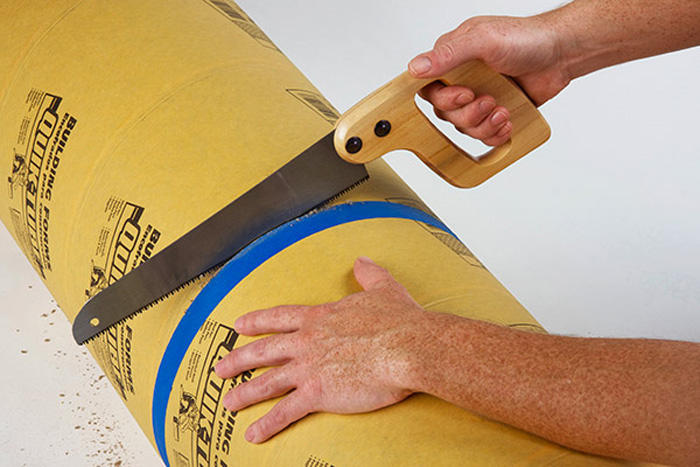
Using tape, connect all the marks around the outside of the tube at both locations. These will be your cutting guides. Using the handsaw cut along these guides.
Step 3
Cut the carpet runner into segments with a carpet knife. Again, measure the outside circumference of the tube to get the exact measurement. Ours measured 37 inches.
The carpet runner is 27-1/4 inches wide. Measure 16 inches over and 37 inches down the length of the carpet runner. Measure two more rectangles the same way and cut these out. These will be glued to the outside of your tubes.
You will have an approximately 27-1/4-inch x 32-inch piece of the runner left. Measure marks that divide each side in half (13-5/8 inches and 16 inches, respectively) and cut. These segments will float free inside the tubes and can be replaced when worn out.
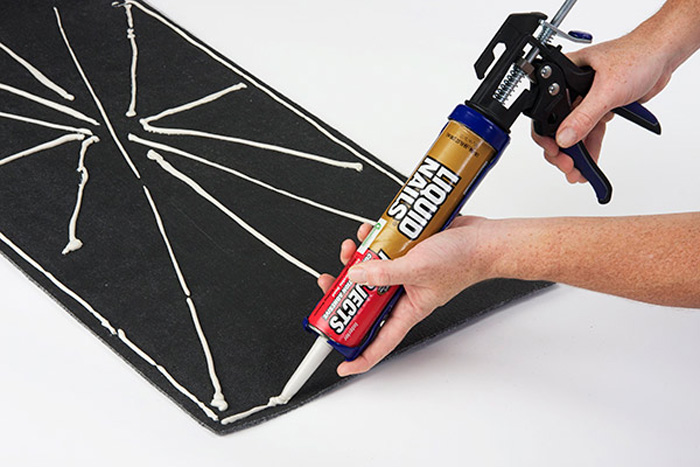
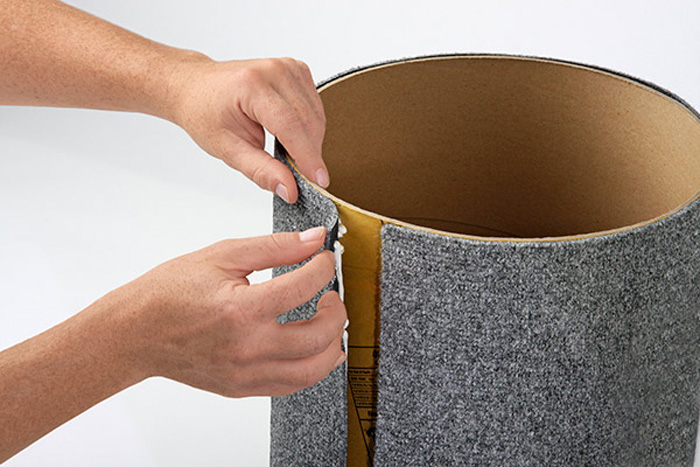
Apply a liberal amount of Liquid Nails adhesive to the back of the first three pieces you cut, as shown in the image. This will ensure that you cover the piece equally. It is best to glue on one piece of carpet at a time to make sure the Liquid Nails doesn’t dry out.
Step 4
After applying the glue, attach the carpet runner to the outside of the concrete tube. You may find it easier to place the tube upright on a flat surface and then wrap the carpet around. This will allow you to use the surface to keep the bottom edges flush. Take your time with this step. Repeat steps 3 and 4 with the other two tube segments.
Step 5
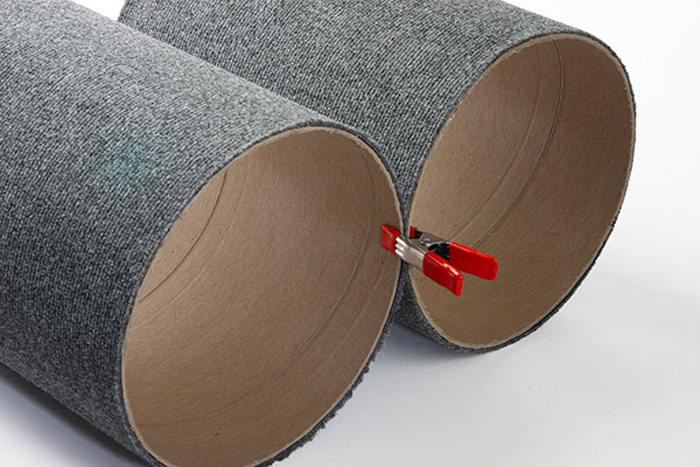
Run a bead of Liquid Nails down the length of two of the carpet-covered tubes along the seam. This way the seams are covered and won’t show. Clamp them together at both ends and let dry overnight.
Step 6
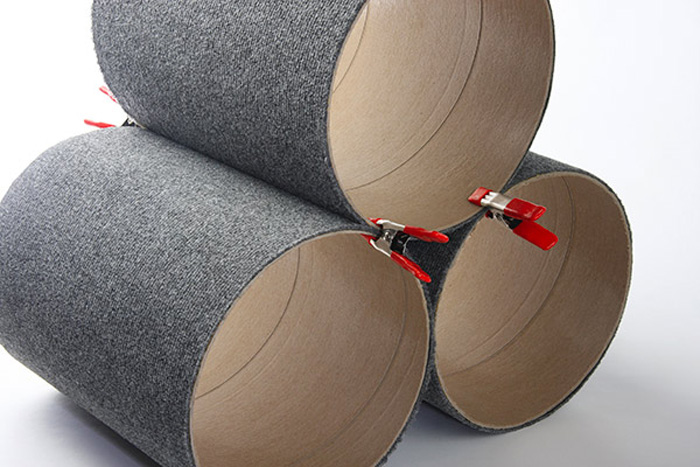
Remove clamps from the two tubes and place the third on top, making sure the seam of the top tube is lined up where it will be glued to a bottom tube. Make a mark on all the tubes where they meet. These will show you where to run your beads of Liquid Nails. Apply the Liquid Nails, clamp, and let dry over night.
Step 7
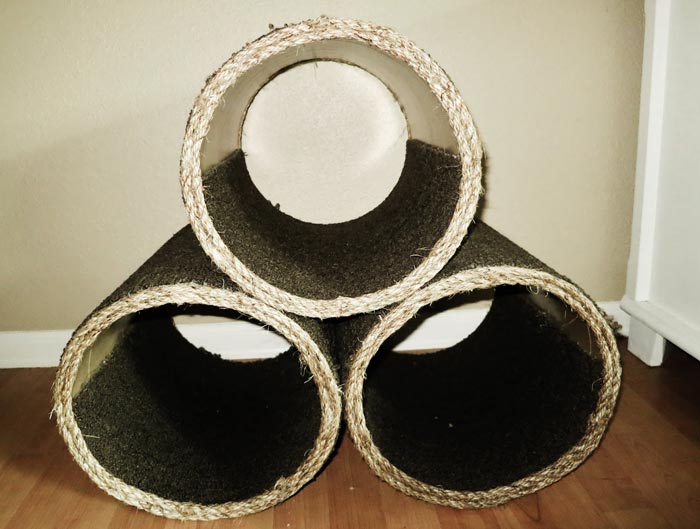
Make a small hole in the top-most tube, inset approximately 2 inches. Feed the rope up through the hole and tie it in a knot to secure in place. Then tie a knot at the other end of the rope. Place the remaining pieces of carpet runner in the bottom of each tube.



Leave a Reply